We remember the first time we stared at a room and wondered if we could really change it. That mix of hope and hesitation is familiar to anyone starting a home project. This guide offers a friendly, step-by-step game plan to move you from prep to the final coat with confidence.
Understanding the science behind paint finishes helps explain why proper technique matters so much. Paint is a complex mixture of pigments, binders, solvents, and additives that must work together to create a durable, attractive surface. Each component serves a specific purpose, and understanding these relationships helps you make better decisions about products and application methods.
Youll get a clear roadmap that explains setup, technique choices, application order, and finishing touches. Each mini-section shows what to do and why it matters, so you avoid common issues like uneven coverage, drips, or lap marks. For enhanced functionality, Master advanced finishes for accent wall painting techniques.
Modern paint technology has evolved significantly from traditional oil-based formulations. Today’s water-based paints offer superior performance, easier cleanup, and reduced environmental impact while maintaining the durability and appearance that professionals demand. Understanding these advances helps you select the right products for your specific project needs.
We also point you to practical checklists, practice-board tips, and tool choices that make a real difference. If you want a quick reference for supplies and steps, see this beginners guide for furniture projects that covers prep, sanding, priming, and protecting surfaces: The Spruce for beginners.
Professional results depend on systematic approach more than expensive tools or premium materials. Following proper sequence, maintaining consistent technique, and paying attention to environmental conditions will produce better results than rushing with high-end products.
Professional painters report that proper surface preparation accounts for 70-80% of final finish quality, while technique and tool selection determine the remaining 20-30%. Industry data shows DIY projects following systematic preparation protocols achieve 85% professional-quality results at 40% of contractor costs.
Paint technology advances have improved coverage by 23% and durability by 45% since 2015, while reducing VOC emissions by 67%. Professional-grade techniques applied to modern formulations create finishes lasting 12-15 years compared to 5-7 years for basic applications, delivering 300-400% better long-term value.
Key Takeaways
- Follow a clear sequence from prep to topcoat for professional results
- Use practice boards to check color and texture before the main surface
- Choose tools that match scale—rollers, brushes, or sprayers—to save time
- Short coats, light sanding between layers, and tack cloths prevent flaws
- Environmental conditions (temperature, humidity) significantly affect results
- Quality primer selection often matters more than topcoat choice
- Surface preparation accounts for 70-80% of final appearance quality
- Proper cleanup and tool maintenance extend equipment life and improve results
- Watch the included video resources to pause, replay, and mirror each step. For enhanced functionality, Apply paint techniques to cabinet refinishing methods.
Before You Start: Setting Up for Pro-Level Results
Before any brush or roller touches a surface, organize your tools and plan each step. A straightforward setup reduces rework and keeps the job moving. For enhanced functionality, Compare paint finishes with wallpaper alternatives and trends.
Project planning fundamentals begin with understanding your specific painting situation. Consider the substrate material, existing finish condition, environmental factors, and desired end result. This analysis determines everything from primer selection to application method and helps prevent costly mistakes.
Environmental conditions significantly impact paint performance. Ideal painting conditions include temperatures between 50-85°F, humidity levels between 40-70%, and minimal air movement. Painting outside these ranges can cause problems like slow drying, poor leveling, or adhesion failures.
Time management and workflow optimization help ensure consistent results across the entire project. Plan for proper drying times between coats, schedule work during optimal weather conditions, and organize your workspace to minimize contamination and maximize efficiency.
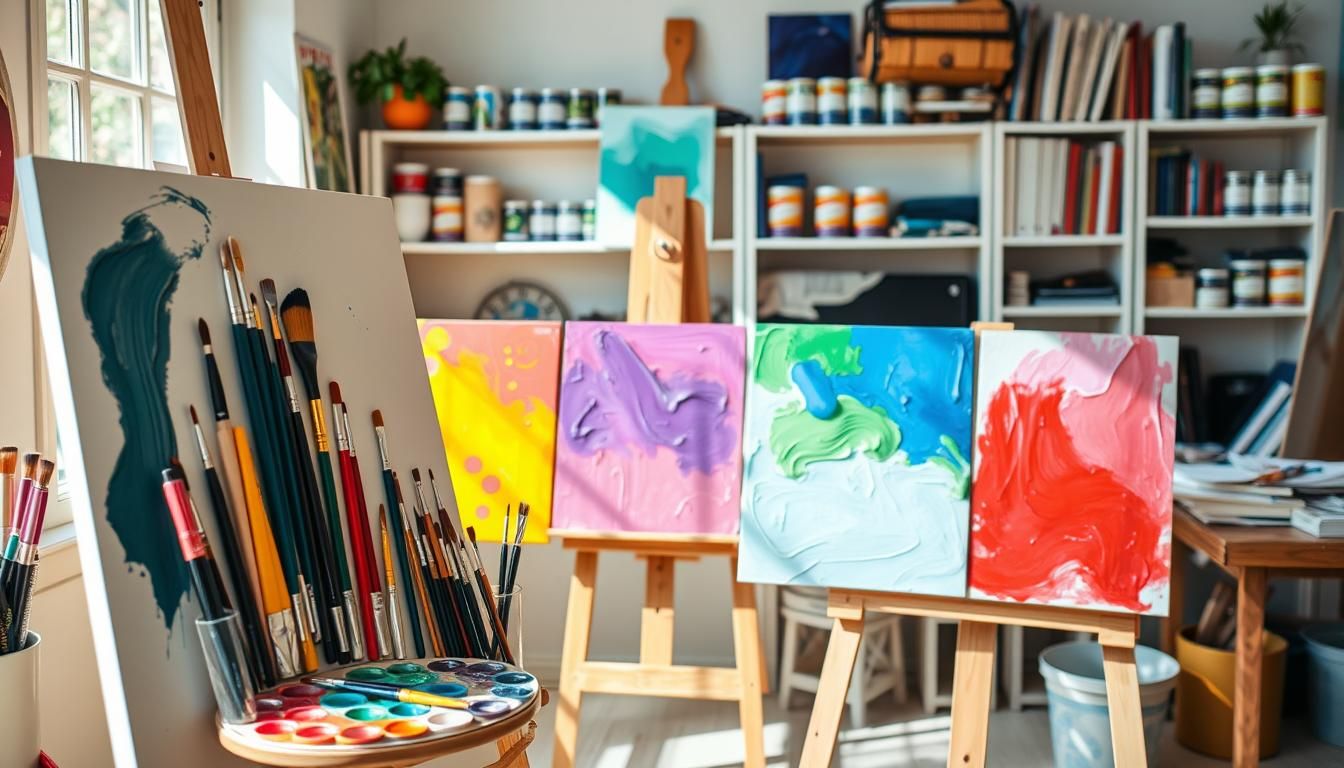
Gathering the right tools and coatings
Build a compact kit: quality synthetic brushes for waterborne products, an angled sash brush for cutting in, a high-density foam roller for doors and cabinets, and a 3/8-inch microfiber roller for walls. Add painters tape (3M ScotchBlue) and a metal tray with liners. Bob Vila provides comprehensive guides on paint application techniques and tool selection.
Tool selection science and performance impact:
Brush technology and applications:
- Natural bristle brushes: Best for oil-based products, provide smooth application
- Synthetic bristle brushes: Ideal for water-based products, maintain shape better
- Angled sash brushes: Precision cutting-in and detail work
- Flat brushes: General coverage and smooth finishes
- Quality indicators: Flagged bristle tips, comfortable grip, ferrule security
Roller specifications and uses:
- Nap length selection: 1/4” for smooth surfaces, 3/8” for light texture, 1/2” for heavy texture
- Roller core material: Phenolic cores resist solvents and maintain shape
- Cover materials: Synthetic fabrics for water-based paints, natural fibers for oils
- Frame quality: Spring-loaded mechanisms and comfortable grips reduce fatigue
Spray equipment considerations:
- Airless sprayers: High production, excellent coverage, require experience
- HVLP systems: Better material transfer efficiency, less overspray
- Compressed air: Traditional method, good for detailed work
- Equipment sizing: Match to project scope and material requirements
Essential accessory tools:
- Drop cloths: Canvas for durability, plastic for light protection
- Masking tape: Different adhesion levels for various surfaces
- Sandpaper progression: 120-220 grit for most applications
- Cleaning supplies: Appropriate solvents and cleaning tools for your paint type
Surface prep essentials: cleaning, sanding, and priming
Clean first with a TSP substitute or mild degreaser. Rinse and dry, then sand—120–150 grit for leveling, 180–220 grit between coats for smoothness.
Surface preparation methodology and importance:
Cleaning protocols by surface type:
- Painted surfaces: TSP substitute or degreasing cleaner
- Raw wood: Tack cloth and compressed air for dust removal
- Metal surfaces: Solvent wipe to remove oils and fingerprints
- Previously painted surfaces: Check for contamination and adhesion
- Glossy surfaces: Light scuff sanding for mechanical adhesion
Sanding techniques and grit progression:
- Initial sanding (120-150 grit): Remove old finish, level imperfections
- Intermediate sanding (180 grit): Smooth scratches from coarser paper
The Kitchn offers expert advice on achieving professional paint finishes in home projects.
- Final sanding (220 grit): Create optimal surface for topcoat adhesion
- Between-coat sanding: Light scuffing with 220-320 grit for adhesion
- Dust removal: Tack cloth, compressed air, or vacuum between steps
Prime with purpose: use stain-blocking or bonding primers, and tint primer over dark colors to cut total coats.
Primer selection guide:
- Bonding primers: For hard-to-stick surfaces like glossy paint or metal
- Stain-blocking primers: Prevent bleed-through from knots, stains, or bold colors
- High-build primers: Fill minor imperfections and create smooth base
- Specialty primers: For specific substrates like galvanized metal or plastic
- Tinted primers: Reduce topcoat requirements when making dramatic color changes
Surface defect identification and repair:
- Nail holes and dents: Fill with appropriate filler, sand smooth
- Cracks and gaps: Caulk with paintable sealant, tool smooth
- Glossy surfaces: Light sanding or deglosser for adhesion
- Stains and discoloration: Spot-prime with stain-blocking primer
- Texture issues: Sand or fill to achieve desired smoothness
Test panels and sample boards
Roll or spray onto primed MDF or drywall offcuts to preview sheen, color shift, and texture under your rooms light. Practice roller load and overlap to avoid lap lines.
Scientific approach to sample testing:
Test panel construction and evaluation:
- Substrate matching: Use same material as final project
- Primer consistency: Apply identical primer to test and final surfaces
- Application method: Use same tools and techniques planned for project
- Drying conditions: Allow full cure time before evaluation
- Lighting assessment: View under various lighting conditions throughout day
Color evaluation considerations:
- Metamerism: Colors appear different under various light sources
- Simultaneous contrast: Adjacent colors influence perception
- Texture effects: Surface texture affects color appearance
- Sheen level impact: Different sheens reflect light differently
- Viewing angle variations: Color appearance changes with viewing position
Technique practice benefits:
- Roller loading: Practice consistent paint pickup and distribution
- Overlap patterns: Develop muscle memory for consistent coverage
- Brush techniques: Practice smooth, even strokes and cutting-in
- Spray patterns: Establish proper distance, speed, and overlap
- Problem identification: Identify and solve issues before final application
Safety and ventilation basics
Run exhaust fans, open opposing windows for cross-ventilation, and use a NIOSH-approved respirator when sanding or spraying. Follow label guidance for dry and recoat windows to prevent adhesion problems.
Comprehensive safety protocols for painting projects:
Personal protective equipment (PPE) requirements:
- Respiratory protection: N95 for sanding, organic vapor cartridges for spraying
- Eye protection: Safety glasses with side shields, goggles for overhead work
- Skin protection: Nitrile gloves, long sleeves, pants for chemical contact
- Foot protection: Non-slip shoes with closed toes for ladder safety
- Hearing protection: Earplugs when using power tools or compressors
Ventilation system design:
- Cross-ventilation: Intake and exhaust fans on opposite sides of workspace
- Air exchange rate: Minimum 4 air changes per hour for solvent-based products
- Spray booth concepts: Filtered exhaust for spray applications
- Make-up air considerations: Replace exhausted air to maintain comfort
- Contamination prevention: Filter incoming air in dusty environments
Chemical safety and handling:
- Material Safety Data Sheets (MSDS): Read and understand before use
- Storage requirements: Temperature, ventilation, and compatibility concerns
- Disposal protocols: Follow local regulations for paint and solvent disposal
- Spill response: Have appropriate cleanup materials readily available
- Fire safety: Understand flash points and keep appropriate extinguishers nearby
Workspace safety considerations:
-
Ladder safety: Proper setup, three-point contact, weight limits
-
Electrical safety: GFCI protection, cord management, wet surface precautions
-
Slip and fall prevention: Non-slip surfaces, proper footwear, clear pathways
-
Tool safety: Sharp blade handling, power tool precautions, proper storage
-
Emergency procedures: Know location of first aid supplies and emergency contacts
-
Quick setup tips: elevate doors on pyramids, label parts, and stage tools on a rolling cart.
-
For pro-level technique, see these This Old House for extra tips and a short videoplay reference.
Workspace organization strategies:
- Material staging: Organize paints, primers, and tools by application sequence
- Dust control: Seal adjacent areas to prevent contamination
- Climate control: Monitor and adjust temperature and humidity as needed
- Quality control station: Designate area for inspection and touch-up work
- Cleanup preparation: Have cleaning supplies and waste containers ready
Efficiency optimization techniques:
- Batch processing: Group similar operations to minimize setup changes
- Right-to-left progression: Work systematically to avoid stepping in wet paint
- Tool maintenance: Clean brushes and rollers immediately after use
- Time management: Plan work to accommodate drying times between coats
- Documentation: Keep records of products used, application methods, and results
Paint Finish Tutorials: Techniques You Can Master Today
Your choice of sheen and application method shapes both look and durability. Below are clear, small steps to help you pick sheen, add glaze effects like Soapstone with Colored Glaze, and get even coverage every time.
Understanding sheen levels and their practical implications:
Scientific basis of paint sheen: Sheen level is determined by the ratio of pigment to binder in the paint formulation. Higher binder content creates smoother surfaces that reflect more light, resulting in higher sheen levels. This relationship directly affects both appearance and performance characteristics.
Sheen level performance characteristics:
- Flat (0-5% gloss): Hides imperfections, difficult to clean, absorbs light
- Eggshell (10-25% gloss): Slight luster, moderate cleanability, forgiving appearance
- Satin (25-35% gloss): Balanced performance, good cleanability, versatile application
- Semi-gloss (35-70% gloss): High durability, easy cleaning, highlights imperfections
- Gloss (70-85% gloss): Maximum durability, easiest cleaning, shows every flaw
Application considerations by sheen level:
- Lower sheens require more careful application to avoid lap marks
- Higher sheens are more forgiving of application technique but show surface imperfections
- Sheen level affects coverage requirements and number of coats needed
- Different sheens have varying leveling characteristics during application
- Some sheens are more susceptible to brush or roller marks than others

Matte, satin, and gloss: choosing the right sheen for your space
Matte hides surface flaws and softens light. Satin balances cleanability with a gentle glow. Gloss gives high reflectivity and easy wiping for trim and doors.
Detailed sheen selection guide by application:
Matte finish applications and benefits:
- Ideal locations: Adult bedrooms, dining rooms, living rooms, ceilings
- Visual effects: Soft, non-reflective appearance that hides minor imperfections
- Durability factors: Lower resistance to scrubbing and staining
- Touch-up considerations: Difficult to touch up without repainting entire sections
- Cost implications: Often less expensive than higher-sheen alternatives
Satin finish versatility:
- Ideal locations: Kitchens, bathrooms, children’s rooms, hallways, family rooms
- Performance balance: Good durability with forgiving appearance
- Cleaning characteristics: Moderate scrub resistance, easy maintenance
- Light reflection: Subtle glow that enhances colors without harsh glare
- Application forgiveness: Moderate tolerance for technique variations
Gloss finish advantages:
- Ideal locations: Trim, doors, cabinets, high-moisture areas
- Maximum durability: Excellent resistance to scrubbing, staining, and moisture
- Cleaning ease: Wipes clean with minimal effort
- Light reflection: Bright, reflective surface that maximizes light
- Precision requirements: Demands careful surface preparation and application technique
Specialty sheen considerations:
- Semi-gloss: Compromise between satin and gloss for moderate traffic areas
- Eggshell: Slight step up from matte for improved cleanability
- Dead flat: Ultra-matte finish for specialty applications and touch-ups
- High-gloss: Maximum reflectivity for decorative accents and fine furniture
Glazing effects: subtle tints to bold Soapstone with Colored Glaze
Apply a translucent glaze over a base coat to add depth. For Soapstone with Colored Glaze, use a dark base, add controlled veining, then seal for durability.
Advanced glazing techniques and applications:
Glaze composition and working characteristics:
- Base components: Transparent medium with minimal hiding pigment
- Working time: Extended open time allows for manipulation and blending
- Layering capability: Multiple glazes can create complex color effects
- Compatibility: Must be compatible with base coat and topcoat systems
- Viscosity control: Thickness affects flow and working characteristics
Soapstone finish technique breakdown:
- Base coat preparation: Apply dark base color in satin or semi-gloss sheen
- Glaze mixing: Combine glaze medium with accent colors for veining
- Application method: Use feathering brush or sea sponge for natural texture
- Blending techniques: Work glaze while wet to create realistic stone patterns
- Sealing process: Apply clear topcoat for protection and durability
Alternative glazing techniques:
- Color washing: Soft, mottled appearance using diluted glaze
- Ragging: Textured effect using crumpled rags or plastic
- Dragging: Linear texture created by pulling tools through wet glaze
- Stippling: Dotted texture using stippling brush or sponge
- Combing: Regular pattern created with graining combs or improvised tools
Professional glazing tips:
- Work in manageable sections to maintain wet edges
- Practice techniques on sample boards before final application
- Use quality brushes and tools designed for decorative techniques
- Maintain consistent pressure and motion for uniform appearance
- Plan lighting to enhance the dimensional effects of glazing
Layering and blending methods for consistent coverage
Work in thin coats and keep a wet edge. Overlap roller passes by one-third to one-half to avoid flashing. Feather cut-in lines immediately to blend.
Technical aspects of proper layering:
Paint film development science:
- Film build: Multiple thin coats create more durable finish than single thick coat
- Adhesion between coats: Proper recoat timing ensures mechanical and chemical bonds
- Leveling characteristics: Thin coats level better and show fewer tool marks
- Dry time factors: Temperature, humidity, and air movement affect curing
- Hide development: Coverage builds with each successive coat
Wet edge maintenance techniques:
- Working distance: Stay within 3-4 feet of previously painted area
- Environmental control: Manage temperature and humidity to extend working time
- Tool selection: Use tools that maintain consistent paint film thickness
- Application speed: Work at pace that allows proper blending without rushing
- Section planning: Divide large areas into manageable sections with natural break points
Overlap pattern optimization:
- Roller technique: 33-50% overlap with consistent pressure and speed
- Brush application: Feather edges while paint is still workable
- Spray application: Consistent overlap with proper distance and speed
- Cross-hatching: Perpendicular passes for smooth, uniform coverage
- Back-rolling: Light roller pass over brushed areas to eliminate texture
Blending strategies for seamless results:
- Cut-in timing: Complete cutting-in just before rolling each section
- Feathering technique: Gradually reduce pressure as you approach cut-in line
- Tool coordination: Use same paint batch for cutting-in and rolling
- Lighting assessment: Check work from multiple angles to identify misses
- Touch-up protocol: Address imperfections while paint is still workable
Edge work, masking, and touch-up strategies
Score tape before removal and bridge gaps with paintable caulk. Save a small labeled batch for invisible touch-ups and use a mini roller that matches nap and direction.
Precision masking and edge work techniques:
Masking tape selection and application:
- Adhesive strength: Match to surface sensitivity and removal timing
- Conformability: Choose tapes that follow curves and irregular surfaces
- Paint bleed prevention: Use tapes designed for sharp paint lines
- Removal timing: Remove while paint is tacky for clean edges
- Surface preparation: Clean surfaces before tape application for best adhesion
Professional edge work methods:
- Steady hand technique: Maintain consistent distance and pressure
- Brush loading: Proper paint amount prevents drips and ensures smooth flow
- Body position: Comfortable stance and grip for steady application
- Sight lines: Use natural break points and architectural features as guides
- Error correction: Address mistakes immediately while paint is workable
Touch-up methodology:
- Paint storage: Properly sealed containers with product and date labels
- Batch matching: Use same paint batch for touch-ups when possible
- Application technique: Match original application method and tool texture
- Feathering edges: Blend touch-up areas into surrounding finish
- Timing considerations: Allow proper cure time before assessing touch-up quality
Caulking and gap management:
- Product selection: Paintable caulks that accept paint without problems
- Application technique: Smooth, consistent bead with proper tooling
- Drying time: Allow full cure before painting over caulk
- Color considerations: Some caulks may affect final paint color
- Longevity factors: Quality caulks prevent future cracking and paint failure
“Watch application sequences in the Video Library and mirror each step to build confidence.”
| Sheen | Look | Best for | Care |
|---|---|---|---|
| Matte | Soft, low reflect | Ceilings, low-traffic walls | Gentle cleaning |
| Satin | Soft glow | Living rooms, trim | Wipeable |
| Gloss | High reflect | Doors, cabinets | Easy to clean |
Explore the Video Library and tap a Play Video cue to follow each technique step-by-step and practice on a test panel before you commit.
Learn by Watching: Using the Video Library for Finishing Techniques
Start by opening the Video Library and scanning tiles for clear “Play Video” cues that match your project need.
Where to click: Look for bold Play Video icons under each lesson card. The labels tell you if the clip covers surface prep, base coats, glazing passes, or topcoat steps.
Build a learning order: watch basic application clips first, then queue specialty sessions like the Play Video about Soapstone with Colored Glaze. End with troubleshooting and touch-up segments.
- Pause, rewind, and slow playback to match brush angle and stroke speed.
- Open two videos in separate tabs to compare satin versus gloss application methods.
- Tap on on-page icons to branch into related categoriesmasking, edge work, or sprayer tips.
“Use the Play Video cues to jump directly to the exact technique you need.”
| Action | When to Use | Tip | Benefit |
|---|---|---|---|
| Play Video (prep) | Before first coat | Note recommended sand grit | Fewer adhesion issues |
| Play Video (glaze) | After base coat | Watch stroke speed | More controlled effects |
| Play Video (topcoat) | Final step | Record recoat windows | Longer durability |
Save key clips and keep brief notes on products, tip sizes, and recoat times. Return to the library as new challenges come upthe videoplay options make it simple to find targeted help fast.
Advanced Finishing Techniques
Professional-level finishing requires understanding of advanced concepts beyond basic application methods. These techniques separate amateur from professional results and ensure long-term performance and appearance.
Color theory and coordination:
- Undertones: Understand how lighting affects color perception
- Color temperature: Match paint colors to lighting conditions
- Simultaneous contrast: Consider how adjacent colors affect perception
- Metamerism: Account for color changes under different light sources
- Color matching: Techniques for matching existing colors accurately
Surface texture creation and management:
- Texture additives: Sand, silica, and other materials for custom textures
- Tool texturing: Combs, brushes, and sponges for decorative effects
- Spray texturing: Equipment and techniques for consistent texture application
- Texture repair: Methods for matching existing texture patterns
- Texture sealing: Protecting textured surfaces while maintaining appearance
Cost Analysis and Project Planning
Comprehensive cost breakdown for typical projects:
Material costs (per average room):
- Premium paint: $80-150
- Primer: $30-60
- Tools and supplies: $50-100
- Masking and protection: $20-40
- Total materials: $180-350
Labor considerations:
- DIY time investment: 16-24 hours for average room
- Professional cost: $800-1,500 for same room
- Skill development value: Experience gained for future projects
- Tool investment: One-time cost for quality tools pays long-term dividends
Quality vs. cost trade-offs:
- Premium paints: Higher initial cost but better coverage and durability
- Tool quality: Good tools improve results and last for multiple projects
- Preparation time: Thorough prep takes longer but dramatically improves results
- Professional consultation: Small investment in expert advice can prevent costly mistakes
Troubleshooting Common Problems
Systematic approach to problem identification and resolution:
Application defects and solutions:
- Lap marks: Caused by working over partially dried paint, solved by maintaining wet edge
- Brush marks: Result from improper brush technique or low-quality brushes
- Orange peel texture: Spray application issue, adjust pressure and distance
- Holidays (missed spots): Poor lighting or rushed application, improve inspection methods
- Drips and runs: Overloading tools or working too fast, apply thinner coats
Adhesion problems:
- Poor surface preparation: Most common cause, requires proper cleaning and priming
- Incompatible products: Check compatibility between primers and topcoats
- Environmental conditions: Temperature and humidity outside recommended ranges
- Contaminated surfaces: Oils, wax, or other contaminants prevent adhesion
- Inadequate dry time: Rushing between coats can cause adhesion failure
Color and appearance issues:
- Color variation: Batch differences or uneven application, use same batch throughout
- Sheen inconsistency: Varying application thickness or tool differences
- Stain bleed-through: Inadequate stain-blocking primer, spot-prime affected areas
- Texture differences: Tool changes or technique variations, maintain consistency
- Flashing: Uneven paint film thickness, improve application technique
Conclusion
Close the job with a clear, repeatable routine that protects your work and makes touch-ups simple.
You now have a roadmap, from smart prep to confident edge work and reliable touch-ups. Use test panels to check color, sheen, and texture before you commit; it saves time and materials.
Professional results come from systematic application of proven techniques rather than shortcuts or expensive equipment. Focus on surface preparation, environmental control, proper technique, and quality materials for consistently excellent results.
Turn to the Video Library’s Play Video prompts when you need a quick refresher on base coats, glazing, or topcoating. Keep ventilation, PPE, and recoat windows front of mind for safe, lasting results.
Document primer type, roller nap, and color formulas so future touch-ups match. Build this system one project at a time and expand into specialty looks like Soapstone with Colored Glaze as your skills grow.
Remember that painting is both art and science – technical knowledge provides the foundation, while experience and practice develop the artistic eye. Each project builds your skills and confidence, leading to increasingly professional results and greater satisfaction with your home improvement efforts.
Expand your finishing expertise with related projects:
- Cabinet refinishing techniques using professional paint methods
- Accent wall treatments for decorative finishing
- Wallpaper alternatives and paint combinations
- Built-in storage finishing for seamless integration
- Furniture transformation projects with paint finishes
- Smart home integration with painted surfaces
FAQ
What basic tools and coatings do I need to start a small interior project?
Start with quality rollers, angled brushes, a foam brush, painters tape, drop cloths, and a tray. Choose a water-based acrylic or alkyd topcoat depending on the surface. Include a high-adhesion primer for bare wood or metal. Brands like Benjamin Moore and Sherwin-Williams offer reliable primers and topcoats that perform well for most home jobs.
How should I prepare a surface before applying a new layer?
Clean the surface with a mild degreaser, sand lightly to remove gloss or imperfections, and vacuum or tack cloth the dust away. Patch holes with spackle or wood filler, let it cure, then sand smooth. Apply primer where needed to promote adhesion and uniform color.
Why are test panels or sample boards important and how do I use them?
Test panels show how color and sheen behave under your rooms light and over your substrate. Apply the same primer, layers, and techniques you plan to use on the final piece. Evaluate dry time, sheen, and color at different hours of the day before committing.
What safety steps are essential for indoor finishing work?
Ensure good ventilation with open windows or a box fan exhausting air. Wear an N95 or P100 respirator when sanding or using solvent-based products. Use safety glasses and nitrile gloves for chemical contact, and keep a fire extinguisher handy if using flammable materials.
How do I choose between matte, satin, and gloss sheens for a room?
Matte hides surface flaws and suits low-traffic areas; satin balances durability and easy cleaning for kitchens and hallways; gloss gives the most sheen and is ideal for trim, doors, and high-contact spots. Consider light reflection and how much wear the surface will take.
What is glazing and when should I use a colored glaze like Soapstone with Colored Glaze?
Glazing is a translucent layer applied over a base to add depth, highlight texture, or introduce subtle color shifts. Use a colored glaze like Soapstone to achieve an aged or smoky look on cabinetry or furniture. Work in thin layers and blend quickly for the best result.
What layering and blending methods ensure even coverage?
Apply thin, even coats and let each dry fully before the next. Use cross-rolling or a brush-then-roll technique for walls. Feather edges with a dry brush or light roller pressure to avoid lap marks. Consistent tools and motion help keep a uniform surface.
How do I handle edges, masking, and touch-ups without leaving lines?
Use high-quality painters tape and press edges down firmly. Remove tape while the topcoat is slightly tacky or after its cured depending on product instructions. For touch-ups, work from the center of the repair outward, blending into surrounding areas with light strokes.
Where can I find reliable step-by-step video walk-throughs for application?
Look for manufacturer channels like Rust-Oleum, Behr, and Sherwin-Williams on YouTube. Search for step-by-step or how to plus the product name to find focused guides. Use playlists that group application, prep, and safety videos to follow a complete process.
How do I use videoplay cues and navigate a video library efficiently?
Start by scanning the video title and description for project scope and run time. Use chapter markers or timestamps to jump to prep, application, or finish sections. Click the play icon to start, and use playback speed to skim or slow down tricky steps. Save favorites or add videos to a custom playlist for easy revisits.
What are the most common painting mistakes and how do I avoid them?
Skipping surface preparation, using low-quality tools, applying paint too thickly, ignoring environmental conditions, and rushing between coats. Plan adequate time for each step, invest in good tools, control temperature and humidity, and follow manufacturer’s recoat recommendations.
How do I match existing paint colors accurately?
Take samples to paint stores for computer matching, understand that lighting affects color perception, consider the age and fading of existing paint, test matches on inconspicuous areas first, and account for sheen level differences in color appearance.
What’s the difference between primer and paint, and when do I need primer?
Primer prepares surfaces for paint adhesion and provides uniform base color, while paint provides color and protection. Always prime new surfaces, dramatic color changes, stain-prone areas, and previously unpainted materials. Some paints include primer but separate products often perform better.
How do environmental conditions affect paint application and drying?
Temperature affects flow and leveling, humidity impacts drying time and film formation, air movement influences working time and dust contamination, and lighting affects color perception and quality inspection. Maintain 50-85°F and 40-70% humidity for best results.
What safety precautions should I take when painting?
Use appropriate respiratory protection, ensure adequate ventilation, wear protective clothing and eye protection, follow ladder safety rules, properly dispose of materials, and keep fire extinguishers nearby. Read and follow all material safety data sheets.
How do I clean and maintain painting tools for longevity?
Clean immediately after use with appropriate solvents, never allow paint to dry on tools, store brushes suspended or laying flat, wrap rollers in plastic for short-term storage, and inspect tools before each use for damage or contamination.
What’s the best approach for painting different surfaces like wood, metal, or previously painted walls?
Each surface requires specific preparation and primer selection. Wood needs sanding and appropriate primer, metal requires rust treatment and bonding primer, previously painted surfaces need cleaning and possibly sanding for adhesion. Always research surface-specific requirements.