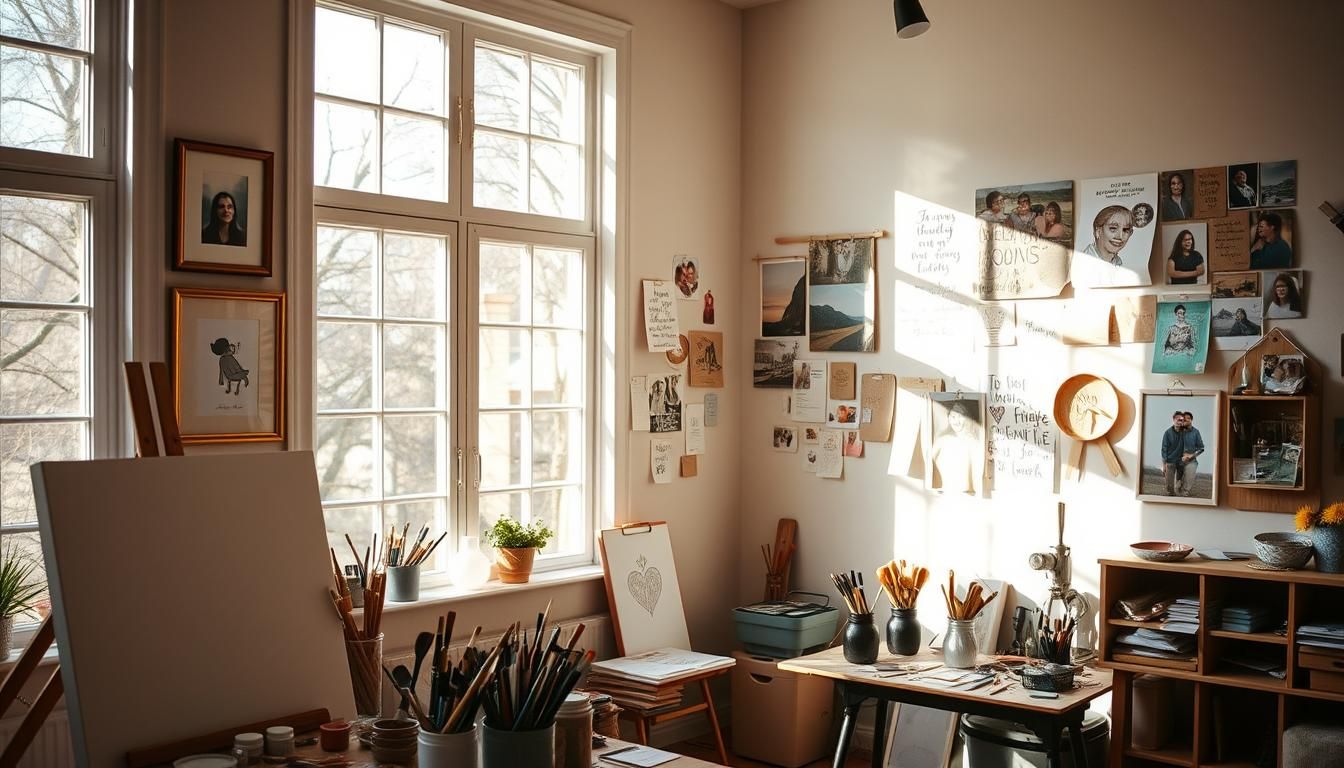
I still remember the first piece I framed for my living room. It started as a quiet idea and became a warm, visible memory that friends noticed right away. That small win taught me that making meaningful decor does not require a studio or special training—just the right techniques and a willingness to experiment with DIY wall art projects.
Creating personalized wall art transforms any space into a reflection of your unique style while staying within budget. Interior design experts at Better Homes & Gardens emphasize that personalized artwork creates the strongest emotional connections in living spaces while offering unlimited customization possibilities. Whether you’re looking for homemade wall decor ideas, custom wall art tutorials, or DIY canvas art techniques, this comprehensive guide covers everything from basic supplies to advanced design principles that professional artists use.
We’ll walk through the complete process—from initial concept to professional-quality prints ready for framing. Professional artists and DIY experts featured in The Spruce recommend mastering fundamental techniques before advancing to complex projects for the best long-term results. You’ll discover which DIY art projects suit your skill level, realistic time expectations for each technique, and insider tips that help you avoid costly mistakes while creating stunning personalized home decor. For enhanced functionality, enhance your art displays with creative accent wall treatments.
Key Takeaways
- Master multiple DIY wall art techniques from digital design to hands-on painting projects
- Create budget-friendly custom art with materials costing under $50 per piece
- Learn professional design principles for balanced, room-appropriate compositions
- Discover trending art styles and personalization methods for any home aesthetic
- Build complete gallery walls with proper planning, framing, and hanging techniques
- Preserve and maintain your DIY art projects for long-lasting beauty
- Transform any room with targeted, custom wall art ideas that reflect your personality
Essential Materials and Cost Breakdown for DIY Wall Art Projects
Smart material selection makes the difference between amateur-looking crafts and professional-quality personalized wall art.
Basic Supply Kit (Under $75 Total Investment)
Digital Design Tools (Free - $20/month):
- Canva Pro subscription: $12.99/month (optional but recommended)
- Adobe Creative Suite alternatives: GIMP (free), Affinity Designer ($70 one-time)
- Online generators: Wordart.com, PBNify (free with premium options)
Physical Art Supplies:
- Canvas boards (8x10 to 16x20): $15-45 depending on quantity and quality
- Acrylic paint set (24 colors): $25-40
- Synthetic brush set (various sizes): $15-25
- Palette knives: $10-15
- Spray fixative/varnish: $8-12
Printing and Framing Budget:
- Home printing: High-quality photo paper ($20), ink cartridges ($40-60)
- Professional printing: $15-50 per piece depending on size and material
- Basic frames: $10-30 each for standard sizes
- Custom framing: $75-200 per piece for premium options
Cost Comparison by Project Type
| Project Type | Material Cost | Time Investment | Skill Level | Final Cost Range |
|---|---|---|---|---|
| Digital Typography Art | $5-15 | 2-4 hours | Beginner | $20-45 |
| Paint-by-Number Custom | $25-40 | 8-15 hours | Intermediate | $50-80 |
| Mixed Media Canvas | $35-60 | 6-12 hours | Intermediate-Advanced | $70-120 |
| Gallery Wall Collection | $100-300 | 15-25 hours | All levels | $200-500 |
Design Principles for Professional-Looking DIY Wall Art
Understanding fundamental design principles transforms amateur attempts into gallery-worthy personalized wall art. Art educators at Architectural Digest consistently teach these same principles to ensure successful outcomes regardless of artistic experience level.
The Rule of Thirds and Visual Balance
Apply the rule of thirds by dividing your canvas into nine equal sections. Place focal elements along these lines or at intersection points for naturally pleasing composition. This technique works whether you’re creating abstract art, typography designs, or photographic pieces.
Visual Weight Distribution:
- Balance bold elements with negative space
- Use color intensity to create focal points
- Distribute visual weight evenly across the composition
- Consider the viewer’s eye movement through the piece
Color Theory for Home Integration
Complementary Color Schemes: Choose colors opposite each other on the color wheel for high contrast and drama. Perfect for statement pieces in neutral rooms.
Analogous Color Palettes: Select 2-3 colors adjacent on the color wheel for harmonious, soothing artwork that blends with existing decor.
Monochromatic Variations: Use different shades, tints, and tones of a single color for sophisticated, cohesive pieces that work in any space.
Typography Hierarchy and Readability
Primary Text: Use large, bold fonts for main messages (36pt+ for prints) Secondary Text: Medium weight fonts for supporting information (18-24pt) Accent Text: Smaller, lighter fonts for details and attributions (12-16pt)
Maintain consistent line spacing (1.5x font size minimum) and ensure sufficient contrast between text and background colors.
Room-Specific DIY Wall Art Recommendations
Different spaces call for different artistic approaches, sizes, and subject matter to maximize visual impact.
Living Room Gallery Walls
Optimal Dimensions: 16x20 to 24x36 inches for primary pieces, with 8x10 to 11x14 supporting artwork Color Palette: Echo existing furniture colors while adding 1-2 accent hues Subject Matter: Abstract landscapes, family photography, inspirational quotes, travel memories
Recommended Projects:
- Large-scale abstract acrylic paintings using palette knife techniques
- Custom family photo collages with elegant typography overlays
- Seasonal artwork that can rotate quarterly
Bedroom Personal Sanctuaries
Sizing Guidelines: Medium pieces (11x14 to 16x20) work best above headboards Color Psychology: Soft blues, greens, and warm neutrals promote relaxation Personal Elements: Incorporate meaningful quotes, travel photos, or nature scenes
Project Ideas:
- Watercolor florals with hand-lettered poetry
- Minimalist geometric patterns in soothing colors
- Custom star maps marking important dates
Kitchen and Dining Areas
Practical Considerations: Use sealed canvases or framed prints to protect from moisture and food splatters Theme Alignment: Food photography, herb illustrations, vintage advertisements Size Constraints: Smaller pieces (8x10 to 11x14) work well in compact spaces
Home Office Inspiration Zones
Motivational Focus: Productivity quotes, goal visualizations, industry-relevant artwork Professional Appearance: Clean lines, modern fonts, sophisticated color schemes Functional Integration: Create pieces that inspire while maintaining workplace appropriateness
Start Here: Complete Setup and Planning Guide
Strategic planning prevents frustration and ensures professional results from your DIY art projects.
Digital Workspace Setup:
- Computer with at least 8GB RAM for smooth design software operation
- Calibrated monitor for accurate color representation
- High-speed internet for uploading/downloading large design files
- External storage for project backups and file organization
Physical Workspace Requirements:
- Well-lit area with natural light supplemented by daylight bulbs
- Flat, protected work surface (2x3 feet minimum)
- Proper ventilation for paint and varnish fumes
- Storage system for supplies and works-in-progress

Project Planning Workflow:
- Room Analysis: Measure wall space, note existing colors, assess lighting conditions
- Style Definition: Gather inspiration images, define color palette, choose artistic approach
- Material Sourcing: Create shopping list, compare supplier prices, order supplies in advance
- Timeline Creation: Allow 2-3x initial time estimates, plan for drying/curing periods
- Quality Control: Plan for test pieces, proof prints, and potential revisions
| Planning Phase | Time Required | Key Decisions | Common Pitfalls |
|---|---|---|---|
| Concept Development | 2-4 hours | Style, size, color scheme | Overthinking, scope creep |
| Material Preparation | 1-2 hours | Quality vs. budget, supplier selection | Cheap materials, insufficient quantities |
| Execution | 4-20+ hours | Technique refinement, patience | Rushing, skipping prep steps |
| Finishing | 2-6 hours | Framing, protective coating, hanging | Inadequate protection, poor hanging hardware |
Complete DIY Canvas Art Tutorials: From Beginner to Advanced
Tutorial 1: Abstract Acrylic Pour Technique
Create stunning fluid art pieces with this beginner-friendly technique that produces professional-looking results.
Materials Needed (Cost: $35-45):
- Pre-stretched canvas (16x20 inches): $8-12
- Acrylic paints (4-6 colors): $15-20
- Pouring medium: $8-10
- Plastic cups and stirring sticks: $3-5
- Disposable gloves: $2-3
Step-by-Step Process:
-
Workspace Preparation (15 minutes):
- Cover work area with plastic sheeting
- Elevate canvas on cups to allow dripping
- Mix each paint color with pouring medium (1:1 ratio)
-
Color Selection and Mixing (20 minutes):
- Choose 3-4 complementary colors
- Add 2-3 drops of silicone oil for cell formation
- Test consistency: paint should flow like warm honey
-
Pouring Technique (10 minutes):
- Layer colors in cup without stirring
- Flip cup onto canvas center and lift slowly
- Tilt canvas to guide paint flow
-
Finishing Touches (5 minutes):
- Use heat gun or torch for cell activation
- Allow 24-48 hours for complete drying
- Apply protective varnish when fully cured
Troubleshooting Common Issues:
- Paint too thick: Add more pouring medium
- No cells forming: Increase silicone oil slightly
- Muddy colors: Use fewer colors or better color combinations
Tutorial 2: Modern Geometric Wall Art Series
Create a cohesive 3-piece geometric series using tape masking and precision painting techniques.
Materials for 3-piece Set (Cost: $50-65):
- Three 11x14 inch canvases: $18-24
- Acrylic paints (3-4 colors): $12-16
- High-quality painter’s tape: $8-10
- Foam brushes and rollers: $6-8
- Pencil and ruler: $3-4
- Spray adhesion promoter: $5-7
Design Planning Phase:
-
Create Master Template:
- Sketch three complementary geometric patterns
- Plan color distribution across the series
- Ensure visual balance when displayed together
-
Pattern Options:
- Canvas 1: Overlapping triangles
- Canvas 2: Concentric hexagons
- Canvas 3: Intersecting circles
Execution Steps:
-
Layout and Masking (45 minutes per canvas):
- Lightly pencil your design onto canvas
- Apply painter’s tape with precision
- Use spray adhesion promoter on tape edges
-
Base Color Application (30 minutes):
- Apply lightest color first using foam roller
- Allow complete drying between coats
- Apply second coat for even coverage
-
Detail and Accent Work (60 minutes):
- Remove tape while paint is slightly tacky
- Touch up any bleeding with small brush
- Add accent colors to selected sections
-
Final Assembly Planning:
- Plan spacing for gallery wall arrangement
- Consider lighting effects on geometric shadows
- Document final arrangement before hanging
Tutorial 3: Personalized Typography Canvas Art
Transform meaningful quotes or lyrics into sophisticated typographic art pieces.
Advanced Typography Techniques:
Material Investment (Cost: $40-55):
- High-quality canvas boards: $15-20
- Professional acrylic paints: $12-18
- Letter stencils or vinyl cutting: $8-12
- Fine detail brushes: $8-10
- Typography reference materials: $5-8
Design Development Process:
-
Text Selection and Hierarchy:
- Choose 1-2 meaningful phrases (maximum 15 words)
- Establish primary and secondary text levels
- Consider reading flow and emphasis points
-
Font Pairing Strategy:
- Primary font: Bold, readable from 6+ feet
- Secondary font: Complementary weight and style
- Avoid more than 2 font families per piece
-
Layout Composition:
- Use golden ratio for text placement (1.618:1)
- Create visual breathing room with negative space
- Balance text weight with background elements
Execution Workflow:
-
Template Creation (60 minutes):
- Design digitally first for precision
- Print full-size templates when possible
- Transfer design using graphite paper
-
Background Treatment (90 minutes):
- Create subtle texture with dry brush technique
- Build color depth with multiple transparent layers
- Allow each layer to fully dry before proceeding
-
Typography Application (120 minutes):
- Use stencils for crisp letter edges
- Build letter thickness with multiple coats
- Add dimension with subtle shadow effects
-
Enhancement Details (60 minutes):
- Add decorative elements sparingly
- Create visual connections between text elements
- Apply protective coating for longevity
Wordart Digital Design Walkthrough: Professional Word-Shape Art
Master digital tools to create sophisticated word-cloud designs that rival professional graphic design.
Advanced Wordart Techniques:
-
Strategic Word Selection (30 minutes):
- Gather 20-50 related terms
- Assign importance weights to key concepts
- Group words by theme or relationship
-
Shape Integration (45 minutes):
- Upload custom SVG shapes for unique silhouettes
- Use photo cutouts for personalized forms
- Create compound shapes for complex compositions
-
Typography Refinement (60 minutes):
- Mix serif and sans-serif fonts strategically
- Adjust individual word angles for flow
- Fine-tune spacing for optimal readability
-
Color Harmony Development (30 minutes):
- Extract color palettes from room photos
- Apply color theory principles for balance
- Create subtle gradients for depth
Export and Printing Optimization:
- Export at 300 DPI minimum for print quality
- Use CMYK color mode for professional printing
- Include bleed areas for edge-to-edge prints
- Save layered files for future modifications
| Advanced Feature | Purpose | Best Used For |
|---|---|---|
| Custom Shape Upload | Unique silhouettes | Family photos, pet outlines, geographic shapes |
| Font Mixing | Visual hierarchy | Emphasizing key concepts, creating contrast |
| Color Gradients | Professional depth | Sophisticated color transitions, room integration |
| Export Variations | Multiple size options | Testing layouts, different frame sizes |
Trending DIY Art Styles and Techniques for 2025
Stay current with popular art movements while adding personal touches that make each piece uniquely yours.
Maximalist Botanical Illustrations
Current Appeal: Large-scale, detailed plant drawings with vibrant colors satisfy the growing interest in biophilic design and nature connection.
DIY Approach:
- Use high-resolution botanical references from public domain sources
- Practice pen and ink techniques with watercolor washes
- Scale up to 18x24 inch formats for dramatic impact
- Layer multiple plant species for complex, museum-quality compositions
Cost-Effective Materials:
- Watercolor paper: $25-35 for quality stock
- Professional watercolor set: $40-60
- Fine-tip watercolor brushes: $20-30
- Botanical reference books or digital subscriptions: $15-25
Modern Abstract Expressionism
Design Philosophy: Bold gestures, emotional color palettes, and intuitive mark-making create powerful focal points in contemporary homes.
Technique Breakdown:
- Gestural Foundation: Use large brushes or palette knives for initial energy
- Color Layering: Build depth with transparent and opaque layers
- Texture Integration: Add sand, modeling paste, or fabric for tactile interest
- Selective Refinement: Add precise details only where they enhance the overall impact
Professional Tips:
- Work on multiple pieces simultaneously for color consistency
- Document process photos for technique refinement
- Consider diptych or triptych formats for larger walls
Minimalist Line Art and Negative Space
Contemporary Relevance: Clean, uncluttered aesthetics complement modern furniture and architectural elements.
Essential Techniques:
- Continuous Line Drawing: Single-line portraits, figures, or objects
- Strategic Negative Space: Use empty areas as compositional elements
- Limited Color Palettes: 1-3 colors maximum for sophisticated restraint
- Precise Execution: Clean lines require steady hands and quality tools
Material Recommendations:
- Bristol board or heavyweight drawing paper
- Technical drawing pens (0.3mm, 0.5mm, 0.7mm)
- High-quality erasers for clean corrections
- Digital alternatives: iPad Pro with Apple Pencil
Mixed Media Collage Revival
Current Trends: Combining traditional and digital elements, vintage papers, and found objects creates unique, personalized narratives.
Layering Strategy:
- Base Layer: Painted or textured background
- Paper Elements: Magazine clippings, sheet music, maps, or personal documents
- Dimensional Additions: Fabric swatches, pressed flowers, or small objects
- Unifying Elements: Paint washes or drawing that ties disparate elements together
Archival Considerations:
- Use acid-free adhesives for longevity
- Protect delicate elements with museum-quality varnish
- Document source materials for personal records
Turn Photos into Paint-by-Number Wall Art with PBNify
Transform personal photographs into engaging, hands-on art projects that combine digital convenience with traditional painting satisfaction.
Advanced Photo Selection Criteria:
Optimal Image Characteristics:
- High contrast between subject and background (70/30 ratio minimum)
- Clear focal point occupying 40-60% of image area
- Minimal small details that would create confusing paint areas
- Strong emotional or personal significance for motivation during long painting sessions
Technical Requirements:
- Resolution: 2000x2000 pixels minimum for detailed conversion
- Format: JPEG or PNG with minimal compression
- Lighting: Even illumination without harsh shadows
- Composition: Subject centered with breathing room at edges
Advanced PBNify Workflow for Professional Results
1. Photo Enhancement (30 minutes):
- Increase contrast by 15-20% before upload
- Sharpen edges to define paint regions clearly
- Crop to eliminate distracting background elements
- Save enhanced version at highest quality setting
2. Palette Optimization (20 minutes):
- Start with 15-20 colors for moderate complexity
- Test both automatic and manual color selection modes
- Preview segmentation at 100% zoom to check detail level
- Adjust complexity based on available painting time
3. Region Refinement (45 minutes):
- Manually merge tiny fragments that would be difficult to paint
- Preserve important facial features or focal point details
- Balance simplification with maintaining image recognition
- Create test print on regular paper for final assessment
4. Professional Printing Setup:
- Choose canvas weight: 280gsm minimum for paint absorption
- Select matte finish to reduce glare during painting
- Include crop marks and color reference guide
- Order 20% larger than intended final size for framing flexibility
Painting Execution Strategy:
- Session 1 (2-3 hours): Complete all background and large areas
- Session 2 (2-3 hours): Work on medium-sized regions and color transitions
- Session 3 (1-2 hours): Fine details and touch-up work
- Session 4 (30 minutes): Final review and protective coating application
“Professional results come from patience with the process—resist rushing through complex areas.”
Quality Control Checklist:
- Print test section on paper to verify color accuracy
- Organize paints by number before starting
- Use proper brush cleaning technique between colors
- Apply thin, even coats to prevent texture buildup
- Document progress with photos for motivation
| Complexity Level | Color Count | Time Investment | Best Subject Types |
|---|---|---|---|
| Beginner | 8-12 colors | 6-10 hours | Simple portraits, pets, landscapes |
| Intermediate | 15-25 colors | 12-20 hours | Detailed faces, flowers, architectural scenes |
| Advanced | 30+ colors | 25+ hours | Complex subjects, fine art reproductions |
Professional Framing and Hanging Techniques
Proper framing elevates DIY art from craft project to professional display, protecting your investment and enhancing visual impact.
Frame Selection Guidelines by Art Type
Canvas Artwork Framing:
- Floating Frames: Create breathing room around canvas edges, modern aesthetic
- Traditional Frames: Direct mounting for classic presentation, cost-effective
- Gallery Frames: Minimal profiles that don’t compete with artwork
- Custom Solutions: Match existing room frames for cohesive gallery walls
Paper-Based Art Protection:
- Matting Requirements: Acid-free materials prevent discoloration over time
- Glass Selection: Museum glass reduces glare, UV-blocking prevents fading
- Backing Boards: Rigid support prevents warping, allows future reframing
- Sealing Methods: Protect from dust, moisture, and environmental damage
DIY Framing Cost Analysis
Budget-Friendly Options ($10-30 per piece):
- Standard sized frames from major retailers
- Pre-cut mats in common dimensions
- Regular glass with basic UV protection
- Simple hanging hardware for lightweight pieces
Mid-Range Solutions ($30-75 per piece):
- Custom-cut mats in specific colors
- Non-glare acrylic instead of glass
- Frames with depth accommodation for canvas
- Professional hanging systems for gallery walls
Premium Investment ($75-200+ per piece):
- Museum-quality materials throughout
- Custom frame profiles in exact dimensions
- Conservation matting and mounting techniques
- Specialized lighting integration planning
Step-by-Step DIY Framing Process
Materials Preparation (30 minutes):
- Measure artwork precisely, including any desired mat borders
- Gather quality cutting tools: mat cutter, metal ruler, sharp blades
- Select mat colors that complement but don’t compete with artwork
- Choose frame style that matches room aesthetic and other pieces
Cutting and Assembly (60-90 minutes):
-
Mat Cutting Technique:
- Mark mat dimensions with light pencil lines
- Use 45-degree bevel cuts for professional appearance
- Test fit before final cuts, measure twice, cut once
- Clean all dust and debris from mat surface
-
Mounting Process:
- Use acid-free mounting corners, never permanent adhesive
- Position artwork for even mat borders (typically wider at bottom)
- Secure temporarily with removable tape for alignment
- Install permanent mounting only after final positioning
-
Frame Assembly:
- Install hanging hardware before inserting artwork
- Layer components: backing board, mounted artwork, mat, glass, frame
- Secure with frame points or clips, ensuring even pressure
- Install dust cover on backing for professional finish
Quality Assurance Checks:
- Verify glass is clean and streak-free before sealing
- Check that artwork is properly centered in mat opening
- Test hanging hardware with artwork weight plus 50% safety margin
- Document frame specifications for future reference or replication
Gallery Wall Planning and Execution
Create cohesive, professional-looking gallery walls that showcase your DIY art collection while complementing your room’s architecture.
Pre-Planning Phase: Room Analysis and Measurements
Architectural Considerations:
- Wall Dimensions: Measure height, width, and any interruptions (switches, outlets, architectural details)
- Viewing Distances: Consider typical viewing angles and distances for optimal piece sizing
- Lighting Assessment: Note natural light patterns, existing fixtures, potential glare issues
- Furniture Relationships: Plan gallery walls in relation to seating areas, focal points, traffic flow
Digital Planning Tools:
- Use apps like Gallery Wall or create templates in PowerPoint
- Print paper templates at actual size for physical mockups
- Take photos of potential arrangements before committing to holes in walls
- Create multiple layout options to compare visual impact
Layout Design Principles
Balanced Composition Strategies:
1. Grid System Approach:
- Uniform spacing between all pieces (2-3 inches typically)
- Consistent frame styles or colors for unity
- Mix of orientations within grid structure
- Works best with 6-12 similarly sized pieces
2. Organic Gallery Clustering:
- Central anchor piece with supporting smaller works arranged around it
- Varied spacing that feels natural but intentional
- Mix of sizes creating visual rhythm and flow
- Allows for future additions and rearrangement
3. Linear Progression:
- Horizontal line of pieces along furniture or architectural elements
- Consistent bottom edge alignment (typically 57-60 inches from floor)
- Gradual size progression or color flow across the arrangement
- Ideal for hallways, above sofas, or long wall spaces
Installation Best Practices
Hardware Selection by Weight:
- Light pieces (under 5 lbs): Standard picture hanging hooks
- Medium pieces (5-15 lbs): Wall anchors or toggle bolts in drywall
- Heavy pieces (15+ lbs): Locate wall studs, use appropriate screws
- Gallery walls: Picture rail systems for easy rearrangement
Professional Hanging Techniques:
-
Template Method:
- Create paper templates of each frame
- Tape templates to wall in desired arrangement
- Mark hanging points through templates
- Remove templates and install hardware
-
Level and Measure System:
- Use laser level for consistent alignment
- Measure distances between pieces precisely
- Mark all hanging points before making any holes
- Double-check measurements with second person
-
Progressive Installation:
- Start with central or largest piece as anchor
- Work outward maintaining consistent spacing
- Use small level for each individual piece
- Step back frequently to assess overall balance
Common Gallery Wall Mistakes to Avoid:
- Hanging pieces too high (57-60 inches to center is standard)
- Inconsistent spacing that creates visual tension
- Ignoring the relationship between art and furniture below
- Insufficient lighting to properly showcase the collection
- Not planning for future additions or rearrangement
Personalization and Customization Techniques
Transform generic DIY projects into meaningful, one-of-a-kind pieces that reflect your family’s story and aesthetic preferences.
Incorporating Personal Photography
Family Portrait Integration:
- Convert meaningful photos to line drawings using apps like Prisma or manual tracing
- Create silhouette compositions with multiple family members
- Use photo transfer techniques on canvas for vintage, artistic effects
- Combine portraits with meaningful text or location references
Travel and Memory Documentation:
- Transform vacation photos into watercolor-style paintings
- Create map-based artwork featuring visited locations
- Design coordinate art featuring important addresses
- Develop timeline pieces showing family milestones
Pet and Nature Photography:
- Stylize pet photos using digital filters before printing
- Create botanical prints from garden photography
- Design seasonal collections showcasing property changes
- Develop abstract interpretations of landscape photography
Custom Color Palette Development
Room-Specific Color Matching:
- Photography Method: Take high-resolution photos of your room in natural light
- Digital Sampling: Use color picker tools to extract exact color codes
- Palette Creation: Develop 5-color schemes including dominant, accent, and neutral tones
- Test Integration: Create small sample prints to verify color harmony
Seasonal and Mood-Based Palettes:
- Spring Fresh: Soft greens, warm yellows, light coral accents
- Summer Vibrant: Deep blues, bright whites, energetic orange touches
- Autumn Cozy: Rich burgundies, warm browns, golden yellow highlights
- Winter Serene: Cool grays, crisp whites, subtle blue undertones
Text and Typography Personalization
Meaningful Content Sources:
- Family mottos, personal mantras, or generational sayings
- Lyrics from “your song” or wedding music
- Coordinates of important locations (meeting, wedding, first home)
- Significant dates in creative formatting
- Children’s artwork or handwriting incorporated digitally
Advanced Typography Techniques:
- Hierarchy Development: Use size, weight, and color to guide reader attention
- Emotional Typography: Match font personality to message sentiment
- Cultural Integration: Incorporate heritage languages or traditional scripts
- Handwriting Digitization: Scan and vectorize personal handwriting for authentic touch
Preservation and Maintenance of DIY Wall Art
Protect your creative investment with proper care techniques that maintain beauty and prevent degradation over time.
Environmental Protection Strategies
UV Light Management:
- Install UV-filtering window film on south-facing windows
- Use LED lighting instead of halogen for reduced heat and UV emission
- Position artwork away from direct sunlight (minimum 6-foot distance)
- Rotate seasonal pieces to prevent uneven fading
Climate Control Considerations:
- Maintain 45-55% relative humidity to prevent cracking or warping
- Avoid hanging artwork near heating vents or air conditioning outlets
- Use dehumidifiers in basements or humid climates
- Install proper insulation behind exterior walls where art is displayed
Dust and Cleaning Protocols:
- Dust frames monthly with microfiber cloths or soft brushes
- Clean glass with streak-free, ammonia-free cleaners
- Vacuum behind frames annually to prevent dust accumulation
- Professional cleaning for valuable or irreplaceable pieces every 2-3 years
Long-Term Storage Solutions
Artwork Rotation Systems:
- Document each piece with photos and storage notes
- Use acid-free tissue paper between stored pieces
- Store flat in climate-controlled areas when possible
- Create inventory system for easy seasonal rotation
Archival Storage Materials:
- Acid-free boxes sized appropriately for artwork dimensions
- Glassine or archival polyester sleeves for delicate pieces
- Cedar blocks or lavender sachets for natural pest deterrence
- Moisture absorption packets in humid environments
Restoration and Touch-Up Techniques
Minor Damage Repair:
- Small paint chips: Use artist’s acrylic in exact color matches
- Frame scratches: Wood markers or touch-up stains
- Mat stains: Careful spot cleaning with appropriate solvents
- Glass replacement: Professional service recommended for custom sizes
When to Seek Professional Help:
- Significant color fading or discoloration
- Structural damage to canvas or paper substrate
- Mold or moisture damage requiring conservation treatment
- Historical or high-value pieces requiring specialized expertise
How to Design Custom Prints in Canva Like a Pro
Master advanced Canva techniques to create sophisticated digital artwork that rivals professional graphic design.
Advanced Layout and Composition
Professional Grid Systems:
- Enable Canva’s grid lines and snap-to-grid functionality
- Use the rule of thirds overlay for balanced compositions
- Create custom guidelines for consistent margin spacing
- Employ golden ratio proportions for visually pleasing layouts
Sophisticated Color Management:
- Upload brand color palettes or room color schemes
- Use color harmony tools to develop complementary palettes
- Apply gradients and color overlays for depth and interest
- Implement monochromatic schemes for elegant sophistication
Typography Excellence:
- Combine maximum 2-3 font families per design
- Establish clear hierarchy with size, weight, and color variations
- Use letter spacing and line height for optimal readability
- Apply text effects sparingly for professional appearance
Advanced Element Integration
Layering and Depth Creation:
- Use transparency and blending modes for sophisticated overlays
- Apply subtle shadows and highlights for dimensional effects
- Create visual depth with foreground, middle ground, and background layers
- Balance detailed elements with negative space for breathing room
Custom Graphics and Assets:
- Upload personal photography for unique background elements
- Create custom shapes using Canva’s drawing tools
- Incorporate hand-lettered elements scanned and uploaded
- Use texture overlays for tactile visual interest
Professional Export and Production Workflow
File Preparation Standards:
- Resolution: 300 DPI minimum for professional printing quality
- Color Mode: CMYK for offset printing, RGB for digital/inkjet printing
- File Format: PDF for complex layouts, PNG for simple graphics, TIFF for photographs
- Bleed Settings: 0.125” bleed for standard printing, 0.25” for large format
Pre-Production Quality Control:
- Soft Proof Review: Check colors on calibrated monitor before printing
- Print Test: Create small-scale proof on intended paper/canvas
- Resolution Verification: Zoom to 100% to check for pixelation or blur
- Color Profile Matching: Ensure file color space matches printer requirements
Production Timeline Planning:
- Digital Design: 2-6 hours depending on complexity
- File Preparation: 30-60 minutes for proper export settings
- Printing: 1-5 business days for professional services
- Framing: 3-10 business days for custom frames
- Installation: 1-4 hours depending on gallery wall complexity
| Print Service Type | Turnaround | Cost Range | Best For |
|---|---|---|---|
| Home Printing | Same day | $5-15 per print | Tests, simple designs, immediate needs |
| Online Services | 3-7 days | $15-40 per print | Standard sizes, basic options |
| Local Print Shops | 1-3 days | $20-60 per print | Custom consultation, quick turnaround |
| Professional Labs | 5-14 days | $50-200+ per print | Museum quality, archival materials |
Budget-Friendly DIY Wall Art Project Collections
Create cohesive art collections that maximize visual impact while minimizing financial investment.
$50 Starter Collection: Beginner-Friendly Projects
Project Set 1: Typography Trio ($45 total)
- Three 11x14 Canva designs printed on quality paper
- Simple black frames from discount retailers
- Coordinating color scheme throughout all pieces
- Time investment: 6-8 hours total
Materials Breakdown:
- Printing (3 pieces): $18
- Frames (3 pieces): $21
- Mounting supplies: $6
$150 Intermediate Collection: Mixed Media Exploration
Project Set 2: Canvas and Digital Hybrid ($135 total)
- One large 16x20 hand-painted canvas piece
- Two smaller 8x10 digital prints with photography elements
- Mix of frames styles for visual interest
- Time investment: 12-15 hours total
Skill Development Focus:
- Paint mixing and brush techniques
- Digital photo manipulation
- Frame selection and coordination
- Gallery wall arrangement principles
$300 Advanced Collection: Museum-Quality Display
Project Set 3: Professional Gallery Wall ($275 total)
- Five varied-size pieces using multiple techniques
- Custom matting and premium framing
- Professional printing on archival materials
- Coordinated lighting plan included
- Time investment: 25-30 hours total
Advanced Techniques Included:
- Abstract expressionist painting methods
- Digital typography with custom fonts
- Mixed media collage elements
- Conservation-quality materials and methods
Conclusion: Transform Your Space with Personalized DIY Wall Art
Your journey into DIY wall art creation starts with a single piece and grows into a personalized gallery that tells your unique story. The techniques, materials, and principles covered in this comprehensive guide provide everything needed to create professional-quality artwork that rivals expensive gallery pieces while staying within budget.
Success in DIY wall art comes from understanding that each technique serves a purpose. Digital design tools like Canva and Wordart offer precision and repeatability perfect for typography-based pieces and geometric designs. Traditional painting techniques provide texture, authenticity, and the irreplaceable satisfaction of hand-created art. Paint-by-number conversions bridge the gap between digital convenience and hands-on creativity.
The key principles that separate amateur attempts from professional-looking results:
- Strategic Planning: Proper room analysis, measurement, and color coordination prevent costly mistakes
- Quality Materials: Investing in archival supplies and proper framing protects your time investment
- Technical Execution: Following established design principles ensures visually pleasing compositions
- Patient Process: Allowing adequate time for each step prevents rushed results that disappoint
Your personalized wall art collection should evolve with your skills and changing aesthetic preferences. Start with simple projects that build confidence, then progressively tackle more complex techniques as your abilities develop. Document your process, maintain organized material storage, and create systems that make future projects more efficient.
Budget-conscious creators can achieve stunning results by focusing on technique mastery over expensive tools, buying quality basics that serve multiple projects, and timing purchases around sales and seasonal discounts. The difference between amateur and professional-looking results often comes from patience and attention to detail rather than expensive supplies.
Frame your creations using upcycled material artwork frames for enhanced sustainability. Integrate your finished pieces into seasonal décor rotation strategies for year-round freshness and visual interest.
Remember: The most meaningful art reflects your personal story, experiences, and aesthetic vision. Whether creating minimalist typography pieces, bold abstract paintings, or intimate family photography displays, let authenticity guide your creative decisions. Your walls should showcase not just artistic technique, but the unique perspective that makes your home truly yours.
Start with one piece, master the fundamentals, and build your skills progressively. The reward is a home filled with original artwork that guests admire and family treasures—all created by your own hands and vision.
Frequently Asked Questions
What’s the total budget needed to start creating DIY wall art?
You can begin with just $50-75 for basic supplies: digital design tools (many are free), printing costs ($15-30), and simple framing ($20-40). More advanced projects range from $100-300 depending on canvas quality, paint selection, and framing choices. The key is starting small and building your supply collection over time.
Which DIY wall art technique is best for complete beginners?
Digital typography design using Canva is ideal for beginners because it requires no special artistic skills, has unlimited undo options, and produces consistent results. You can create professional-looking pieces in 2-4 hours with just a computer and internet connection. Once comfortable with digital tools, progress to paint-by-number conversions or simple abstract techniques.
How do I choose the right size artwork for my wall space?
Follow the two-thirds rule: artwork should cover approximately 60-75% of the wall space above furniture. For gallery walls, treat the entire collection as one unit when measuring. Consider viewing distance—larger pieces work better in spacious rooms, while smaller pieces suit intimate spaces. Always measure twice and create paper templates before final installation.
What’s the difference between printing on canvas vs. paper for DIY art?
Canvas provides texture, durability, and doesn’t require glass protection, making it ideal for paintings and mixed media pieces. Paper offers sharper detail reproduction and lower cost but needs framing with glass for protection. Choose canvas for textural, painterly effects and paper for crisp typography or detailed photography-based designs.
How do I ensure my DIY art matches my room’s color scheme?
Take high-resolution photos of your room in natural light, then use digital color picker tools to extract exact color codes. Create a 5-color palette including wall colors, furniture tones, and accent colors. Test print small sections before committing to large pieces. Consider how lighting affects colors throughout the day.
What are the most common mistakes in DIY wall art projects?
The biggest mistakes include rushing the planning phase, using low-resolution images for printing, choosing frames that compete with artwork, hanging pieces too high (57-60 inches to center is standard), and not considering the relationship between individual pieces in gallery walls. Take time for proper preparation and test prints.
How long does it take to complete different types of DIY wall art projects?
Digital design projects take 2-6 hours depending on complexity. Hand-painted canvases require 8-20 hours including drying time. Paint-by-number conversions need 6-25 hours based on detail level. Gallery wall planning and installation adds 4-8 hours. Always allow 2-3x your initial time estimate for best results.
Can I create professional-looking art without formal training?
Absolutely. Focus on mastering fundamental design principles (rule of thirds, color harmony, typography hierarchy) rather than advanced techniques. Use digital tools for precision, start with simple compositions, and study professional examples for inspiration. Practice with inexpensive materials before investing in premium supplies.
How do I preserve and maintain my DIY wall art long-term?
Keep artwork away from direct sunlight (minimum 6 feet), maintain 45-55% humidity to prevent warping, and dust monthly with microfiber cloths. Use UV-filtering window film and LED lighting to minimize fading. For valuable pieces, consider museum-quality glass and professional cleaning every 2-3 years. Store seasonal pieces flat with acid-free materials.
What’s the best way to plan a gallery wall layout?
Start by measuring your wall space and creating paper templates of each frame at actual size. Use the template method: tape paper cutouts to the wall to test arrangements before making holes. Maintain 2-3 inches between pieces, keep the bottom edge of artwork 8-10 inches above furniture, and anchor the arrangement with your largest or most important piece.
How do I make my DIY art look more personalized and unique?
Incorporate elements that tell your story: family photos converted to line art, coordinates of meaningful locations, handwriting samples digitized and integrated into designs, or color palettes extracted from favorite vacation photos. Use personal quotes, song lyrics, or family mottos rather than generic sayings.
Which trending art styles work best for DIY projects in 2025?
Maximalist botanical illustrations, modern abstract expressionism, and minimalist line art are particularly popular and achievable for DIY creators. Mixed media collage revival offers great personalization opportunities. Focus on techniques that match your skill level while staying current with design trends.
How do I troubleshoot common printing and color issues?
For home printing, calibrate your monitor and use ICC profiles from your printer manufacturer. Print test swatches first and allow inks to dry completely. If colors look different than expected, check your color mode (RGB vs CMYK) and consider professional printing for critical color accuracy.
Can I sell my DIY wall art creations?
Yes, but check licensing requirements for any fonts, graphics, or images used in your designs. Original hand-painted work and typography using commercial-licensed fonts can typically be sold. Document your creative process and maintain high quality standards. Consider starting with local markets or online platforms like Etsy.
What should I do if I make a mistake during a painting project?
For acrylic paints, work quickly to blend mistakes while wet, or let dry completely and paint over with opaque coverage. Keep small brushes for detail corrections and maintain a palette of mixed colors for consistent touch-ups. Document your color mixing ratios for future reference. Remember that some “happy accidents” can enhance the final piece.
How do I know when to invest in professional framing vs. DIY framing?
DIY framing works well for standard sizes, simple compositions, and temporary displays. Invest in professional framing for valuable pieces, unusual sizes, complex matting needs, or when archival preservation is important. The cost difference is usually $50-150 but professional framing significantly enhances presentation and longevity.