There’s a small, stubborn joy in rescuing a piece of wood and turning it into something that matters. I still remember sanding my first board and imagining a coffee table that would center family nights.
This guide collects practical, budget-friendly ideas to refresh your home and garden. You’ll find quick wins, mid-level builds, and larger challenges that match your skill set.
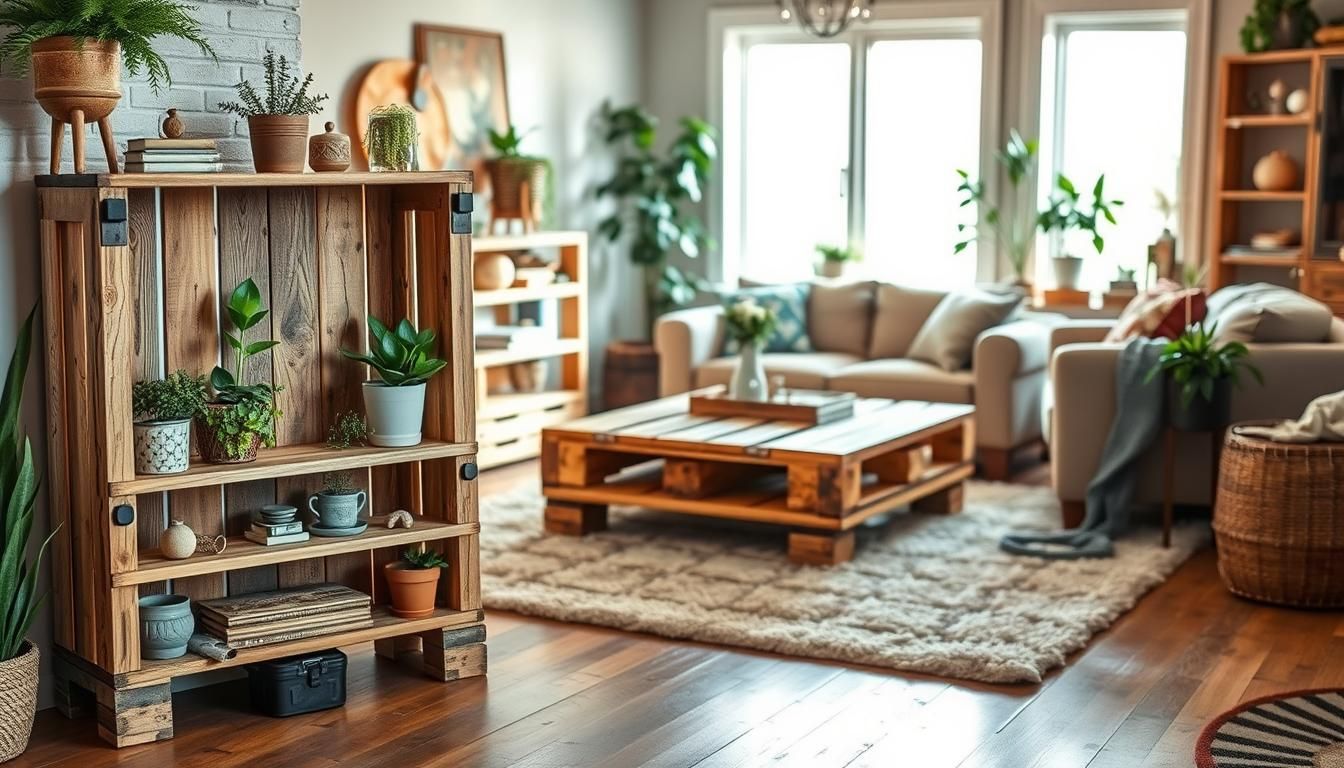
Expect clear safety tips, sourcing advice for heat-treated timber, and styling notes that help each piece look designer-made. Real examples—from vertical herb planters to a glass-topped coffee table—inspire adaptations for apartments and yards alike. For related solutions, explore outdoor shed furnishing solutions.
For extra inspiration, browse a visual roundup of pallet inspiration on Pinterest: pallet inspiration. For related solutions, explore sustainable flooring companions.
Key Takeaways
- Transform shipping wood into functional décor for both home and garden.
- Find ideas for all levels: simple trays to full outdoor seating.
- Focus on safe sourcing and prep to extend the life of each build.
- Styling choices—stain, paint, hardware—make pieces fit your decor.
- Sustainability and low cost are central benefits of these approaches. The EPA emphasizes the environmental benefits of upcycling materials like pallets. For related solutions, explore zero-waste improvement philosophy.
Start here: How to source, prep, and sanitize pallet wood safely
Start smart: locate trustworthy boards, verify stamps, and use the right tools to break them down safely. This way you cut cleanup time and reduce health risks before any build.
Where to find free or low-cost pallets in the United States
Call local hardware stores, garden centers, small warehouses, and construction firms to ask about giveaway or low-cost pallets. Always get permission and pick them up promptly.
Check for clean stock: avoid boards with oil stains, strong odors, mold, or pest damage to save prep time later.
Heat-treated vs. chemically treated: decoding pallet stamps
Learn the stamp codes. HT means heat-treated and is usually safe for indoor furniture. Avoid MB (methyl bromide) and unknown stamps to limit chemical exposure. The EPA on chemical treatments and wood safety for indoor use.
Sanding, sealing, and splinter-proofing for indoor and outdoor use
Use pry bars, a recip saw with a bi-metal blade, and a pneumatic nail remover if you have one—Cotty highlights that tool for faster de-nailing.
Sand in stages (80/120/180 grit), vacuum dust, then wipe with mineral spirits before staining or sealing. For outdoor items pick exterior-grade screws and weatherproof finishes.
- Pre-drill and clamp boards when gluing panels.
- Seal end grain and consider a glass top for high-touch surfaces.
- Document stamps and store boards off the ground to prevent warping.
Living room wins: coffee tables, sofas, and statement accents
Design a comfortable living area around smart, durable builds that handle everyday life. Start with one bold piece and repeat its tones across the room to create a unified look.
Glazed coffee table for a smooth, spill-safe surface
Top a low-profile coffee centerpiece with toughened glass to protect the grain and make spills easy to wipe away. A glass top keeps the rustic charm while making the surface kid- and guest-friendly.
Consider castors with brakes for mobility and felt pads to protect floors.
Stacked-sofa seating with cushioned comfort
Stacked pallet bases make a sturdy sofa platform. Use high-density foam and breathable fabric covers for long-lasting comfort.
Secure sections with brackets and add hidden storage under the platform for blankets and games.
Industrial feature wall and geometric display shelves
Create a modular wall using slats and cubbies. This converts storage into a striking focal point and displays plants, books, and decor as art.
| Idea | Benefit | Finish Tip |
|---|---|---|
| Glazed coffee table | Spill-resistant, smooth surface | Toughened glass, felt pads, castors |
| Stacked sofa | Modular seating, hidden storage | Brackets, breathable cushions |
| Geometric wall | Statement display and storage | Repeat stain, matte-black accents |
For build inspiration and a full how-to for a pallet coffee table, check the linked guide. Tie the room together with textiles like chunky throws and linen pillows to soften reclaimed textures.
Bedroom upgrades: pallet beds, headboards, and wall cladding
A solid platform and a stained finish can transform plain boards into a focal bed that anchors the room.
Full platform bed: Build a low-profile bed from sturdy bases and frame pieces. Stain the surface to deepen the wood grain and add warmth. Leave space for under-bed drawers to keep linens and seasonal bedding tidy.
Quick headboard makeover: Mount a slatted headboard for a fast, budget-friendly focal point. Sand edges well, seal for snag-free linens, and add a narrow floating shelf for small lamps or books.
For a designer reclaimed look, arrange slats with mixed stains to mimic paneling. Back the headboard with felt or rigid foam for comfort and noise reduction. If you rent, choose a freestanding option or pressure-mounted panels to avoid wall damage.
!pallet headboard
| Upgrade | Key Benefit | Finish Tip |
|---|---|---|
| Stained platform bed | Anchors room, adds warmth | Deep stain + low-VOC sealer |
| Slatted headboard | Quick focal update | Sand edges, seal, add shelf |
| Reclaimed-look cladding | Cabin vibe without heavy cost | Mix stains, stagger slats |
For step-by-step headboard ideas, see this handy guide on DIY headboards with pallets. Pair the rustic timber with crisp bedding and metal accents to keep the room feeling fresh and modern.
Kitchen and dining: islands, spice racks, trays, and signs
You don’t need more square footage to improve your kitchen—just smarter, modular additions. A slim island and a wall pantry bring extra worktop and quick-access storage without crowding the room.
Narrow island idea: Build a compact island with a natural worktop and an open lower shelf for baskets. Sand and seal the top with a food-safe finish. Add locking castors so you can move it for cleaning or entertaining, then lock it in place.
- Wall-mounted pantry and spice rack: shallow shelves sized for tins and jars, plus chalkboard doors for weekly meal notes. My Thrifty Life by Cassie Fairy shows a smart blackboard-and-pinboard combo.
- Rustic serving trays: de-nailed boards, iron handles, rounded edges, and a tough topcoat for daily use—ideal for coffee or breakfast in bed.
- Chalkboard signposts and menu signs: paint with chalk paint for flexible messaging during parties or seasonal decor.
Quick tips: Add spice-rack rails to hold jars, integrate a towel bar at the island end, and dry-fit components before glue or screws. For step-by-step help, follow a tutorial and match stain or paint to existing cabinets for a unified finish.
Small-space genius: balcony seating and compact storage
A thoughtful layout, cushions, and integrated drawers make small balconies much more useful.
Corner bench with built-in drawer storage
Stack a low bench to fit your railing clearances and use the internal voids for shallow drawers. This hides cleaning tools, magazines, or cushions without taking floor space.
Add a flip-up lid or plastic-lined bins to keep contents dry. Keep the frame light and anchor the bench to the wall or rail to prevent tipping on apartment balconies.
Slim slot-in seating with LED atmosphere
Create a narrow, slot-in seat that slips beside planters or posts. Bespoke Balconies shows how slim units pair with warm LED strips for a cozy evening glow.
Use exterior cushions with water-resistant covers and tie them down. Sand exposed edges and cap raw ends with trim so clothing won’t snag.
- Fit a narrow rail-height shelf behind the seat for drinks or a small table surface.
- Choose breathable outdoor stains to protect the wood and reapply seasonally.
- Check HOA size and color rules before installing fixed pieces.
Quick way to adapt: add a small fold-away table to switch from morning coffee to evening lounging, and keep weight low with lighter frames and secure fastenings.
Home office and tech: desks, organizers, and laptop stands
Make your workspace work harder by turning simple boards into organized, ergonomic solutions. A few small builds can tidy cables, improve posture, and make the room feel productive.
!desk
Vertical organizer for stationery and display
Turn a pallet on its side and wall-mount it to create ready-made cubbies. Use the bays for notebooks, mail, and small decor. Add a top rail for plants and a row of hooks for keys.
Outdoor desk for WFH in the sunshine
Anchor a slim desk to a fence or wall and seal the wood for weather. Keep essentials in built-in slots and run cable grommets to hide chargers. Use lag bolts into studs or masonry anchors for a solid fit.
DIY laptop desk and ergonomic stand
Make a laptop stand with the right height and tilt to cut neck strain. Add ventilation slots and a cable loop. Consider a detachable keyboard tray so the setup can grow into a dual-monitor desk.
- Use smooth, sealed surfaces near wrists to prevent snags.
- Install under-desk peg rails for headphones and bags.
- Paint to energize the room or choose a clear matte finish for calm.
Storage that looks good: racks, shelves, and tool benches
With a little planning, your entry and garage can gain calm, functional storage that looks intentional.
Create a coat rack that doubles as a display. Preserve block stamps and use them as visual accents. Add hooks, a top ledge, and small cubbies for keys and mail. This keeps everyday items handy and tidy.
For the garage, build a rugged bench with a pallet-wood top and a slatted wall panel for tools. Use structural screws and ledger supports under the bench for heavy loads. Add a French cleat so shelves are movable with the seasons.
Near the door, mount shallow shoe racks to lift pairs off the floor. Hide gloves and leashes in baskets that slide into bays. Fit a slim cover over a radiator with wide slats for airflow and a top shelf for baskets or decor.
Quick kit tips:
- Finish halls in scrubbable paint to handle mud.
- Mount into studs and check clearances for doors.
- Repeat materials for a cohesive look across each place.
| Piece | Key feature | Best finish |
|---|---|---|
| Coat rack with cubbies | Stamped blocks + hooks | Clear sealer or matte paint |
| Garage tool bench | Slatted panel + ledger support | Exterior varnish |
| Shoe rack & radiator cover | Shallow wall mount + airflow slats | Scrubbable paint |
Wall art and decor: stencils, frames, and farmhouse signs
Give a bare wall personality with textured wood art that reads like a gallery piece.
Stencil art on slats creates a statement by masking geometric shapes with painter’s tape, then layering metallic or matte paints. Work across staggered slats for depth, and distress lightly to keep a vintage feel.
Photo transfers and custom signs
Transfer photos onto prepared boards to make rustic frames that protect favorites from UV and fingerprints. Seal with a clear matte or satin topcoat for low sheen or easy cleaning.
Flag and seasonal cutouts
Build an American flag from slats by clamping guides for straight lines, or cut pumpkin silhouettes for fall displays. Repaint templates for other seasons so one piece serves many looks.
- Mix stencils and typography to personalize pieces for kids’ rooms or a home bar.
- Hang larger panels with French cleats for a flush, secure mount.
- Use leftover paints and offcuts to keep costs down while making a cohesive gallery wall.
Garden essentials: planters, raised beds, and potting benches
A few well-placed planters and a compact potting table will make daily gardening easier and more joyful. Start by choosing sizes that fit your space and sun exposure.
Build raised boxes from side troughs to create tiers that show off herbs and annuals. Scalloped-edge planters add charm at a fence line and make borders pop.
Mini succulent displays work well in narrow pockets and bright, dry spots. Line all boxes with landscape fabric and use food-safe liners for edibles.
Quick potting bench: stand two pallets upright, top with tile or a slab, and add hooks for trowels. This makes a hose-off surface that stays handy near water and tools.
!garden planter
- Pre-drill and use exterior screws; seal with UV-resistant finish.
- Consider caster wheels with locks for movable planters on decks.
- Mulch the top layer to cut water loss and tidy the look.
| Build | Best use | Finish tip |
|---|---|---|
| Tiered raised boxes | Herbs, mixed flowers | Landscape fabric + exterior sealer |
| Scalloped planter | Border accent | Contrast paint, seal edges |
| Potting bench | Prep area, potting & storage | Tile/slab top, hooks, close to water |
If you’re new to building, follow a photo-led tutorial and dry-fit frames before final cuts. Small steps save time and materials.
Grow vertically: herb gardens, trellis fences, and hanging baskets
Layering greenery up a wall is one of the quickest ways to add scent and flavor to your outdoor space. Vertical solutions fit balconies, small yards, and sunny kitchen walls. They save floor space and make harvesting easy.
Vertical herb garden with chalkboard labels
Build a wall-mounted herb garden with wide slats and pocketed bays. Add a narrow chalkboard strip across the top for plant names and seasonal notes.
Group herbs with similar watering needs in one tier to simplify care and avoid overwatering.
Trellis-style fence to add height and light
Mount a slim trellis above an existing wall to gain privacy without blocking sun. Use stainless fasteners and spacers so the wall can dry after rain.
This is a smart way to extend a low fence and let climbers soften hard surfaces.
Wall planters and floating-look basket backers
Paint planters the same color as the background for a floating effect. Hang baskets from backer boards to protect siding and make swaps simple.
- Anchor frames into masonry or studs for safety.
- Add a drip line or soaker hose to reduce daily watering.
- Include a small sign or label system to keep harvests organized.
Relax outdoors: pallet swing beds, benches, and lounge seating
Turn your yard into a calm retreat with simple lounge solutions that invite long afternoons and evening chats.
Boho swing bed: Reinforce the frame with extra lumber and use rated hanging hardware. Choose rot-resistant rope or exterior chain and test load limits before use.
Pick a waterproof or vinyl-covered mattress and add breathable outdoor fabrics for comfort. Keep at least three feet of clearance behind and under the swing for safe motion in a family garden.
Corner bench with hidden storage
Wrap seating around a firepit or lighted zone and hinge seats for storage. Anchor posts into concrete or solid framing to prevent shifting.
Use UV-stable finishes and space slats evenly. Add sloped backs and armrests to encourage longer conversations under string lights.
No-tools lounge for quick DIY
Stack and sand modules for a fast weekend sofa. Secure sections with heavy-duty ties or brackets if you want extra stability.
| Design | Key safety point | Finish tip |
|---|---|---|
| Boho swing bed | Use rated hardware; test load | Exterior stain + waterproof mattress |
| Corner bench with storage | Anchor into solid framing | UV-stable sealer; hidden hinges |
| No-tools lounge | Secure with heavy ties or brackets | Sand edges; outdoor cushions |
- Refinish seasonally and inspect ropes or chains periodically.
- Elevate the vibe with lanterns and layered lighting.
- Follow simple diy steps and always prioritize rated hardware for hanging furniture.
Pathways and privacy: walkways, dividers, and screen ideas
A simple wood path changes how you move through a yard and where you pause. A curved lane draws the eye to planters, birdbaths, or a quiet bench. This approach works for tight courtyards and larger plots alike.
Pallet board garden walkway with meandering lines
Dismantle pallet boards and lay them over compacted gravel to form a soft, meandering way. Stagger joints and leave small gaps so water drains freely.
Pin edges with stakes to stop shifting. Curve the route around focal points to create pleasant sightlines and natural pauses.
Budget privacy screens with climbing plants
Build slatted frames and plant jasmine, clematis, or ivy to green them up. Match stain or paint to your fence so the new screen feels intentional.
Set posts in concrete for strength or use heavy planters if you can’t dig. Add hooks on the back for lights or tools to double the screen’s function.
| Build | Key tip | Finish |
|---|---|---|
| Meandering board path | Compact gravel base; staggered joints | Seal boards; refresh yearly |
| Slatted privacy screen | Alternate slat widths for airflow | Paint to match fence or trim |
| Planter-base screen | Use heavy planters as anchors | Use exterior stain; add climbers |
Upcycled pallet projects for pets and kids
Make a cozy nook for little readers and furry friends with simple wood builds that fit your space.
Cozy dog bed or weatherproof dog house: Trim a standard pallet footprint to size, add low sides, and fit a removable cushion for easy washing. For outdoor use, raise the base so the floor stays dry and add a sloped roof with a weatherproof finish.
Kids’ book ledges and playful signposts: Mount shallow ledges at child height and fit front knobs that double as hooks for costumes or headphones. Paint cheerful signs with favorite titles to encourage reading time and personalize a nook.
“Small, well-made pieces make a big difference in how kids and pets use a room.”
- Sand and round edges to prevent snags on paws or little hands.
- Use non-toxic finishes and allow a full cure before use.
- Add felt pads under indoor beds to protect floors and simplify cleaning.
Customize each piece to breed size or wall area. A made pallet base sized right will feel intentional in any home rack or reading corner.
Lighting and fixtures: pendant light boxes and accent pieces
Good lighting turns rough timber into a warm focal point that both looks intentional and functions safely. This section shows how simple wooden frames and organizers lift a room’s style while hiding hardware and cords.
Pallet light box to conceal ceiling hardware
Build a shallow light box to disguise junction boxes and route cords neatly. Mount pendants through the box for a polished look over an island or table.
Use heat-resistant finishes and leave ventilation gaps so fixtures stay cool. Route channels inside the box for tidy cord management and easier bulb changes.
Radiator covers and entry organizers with hooks
Radiator covers can double as slim consoles; ensure slat spacing allows airflow while offering a usable top surface.
Create a compact entry organizer with hooks and a narrow shelf for wallets and sunglasses. Add small under-shelf LEDs for a subtle night glow.
- Echo the light box finish on nearby shelves or a sign to unify accents.
- Choose sturdy anchors or toggle bolts for overhead mounting into joists.
- Consider dimmers to tailor ambiance where rustic wood meets modern furniture.
From workshop to wow: boxes, bins, and full builds
Smart glue-ups and measured plans let you convert loose slats into furniture-grade surfaces and utility storage. Start by sorting straight boards and removing fasteners so your laminations sit flat.
Sturdy storage boxes and laminated boards
Laminate slats into solid boards by alternating grain direction, clamping tightly, and wiping excess glue before it skins. These boards make tabletops, lids, and shelves that look finished.
Build rugged boxes with finger-friendly edges, rope or metal handles, and clear labels for workshop order. Keep a cutlist and hardware checklist to cut down on store runs.
Coop cladding and a step stool from offcuts
Use straight, sealed boards for chicken coop cladding so the exterior sheds water and stays tidy. Turn offcuts into a compact step stool; check joinery and add anti-slip feet for safety.
Kitchen waste-paper container with a side slot
Make a slim kitchen bin with a side insertion panel so it stays usable even when items sit on top. Speed deconstruction with a pneumatic nail remover, then magnet-sweep the area to collect hidden fasteners.
Follow a measured plan or a short tutorial and dry-fit all parts before glue and screws. Sand joints flush, fill voids, and choose exterior-grade finishes for utility pieces that live in sheds or garages.
Pallet Project Cost Analysis and Professional Techniques
Understanding project costs and professional techniques helps DIYers achieve commercial-quality results. Comprehensive planning, proper tool investment, and expert finishing methods transform simple pallets into lasting furniture and garden features.
Budget Planning and Investment Ranges
Simple weekend projects like serving trays, small planters, and wall art cost $20-$75 including materials, hardware, and basic finishes. These builds require minimal tools and develop fundamental skills.
Intermediate furniture projects including coffee tables, benches, and storage solutions range $75-$250 for materials, hardware, cushions, and protective finishes. Plan 12-20 hours over 2-3 weekends.
Advanced builds like bed frames, kitchen islands, and garden structures cost $200-$500+ including quality hardware, professional-grade finishes, glass tops, and specialized components.
Tool Investment and Safety Equipment
Essential tools include pry bars ($15-$40), drill sets ($50-$150), and orbital sanders ($80-$200). Power tool upgrades like circular saws ($100-$300) and pneumatic nailers ($150-$400) speed work for frequent builders. Always prioritize safety equipment including gloves, eye protection, and dust masks. For comprehensive tool safety guidelines, reference OSHA.
Professional Finishing and Maintenance
Expert surface preparation involves progressive sanding (80-120-180 grit), moisture content assessment, and complete dust elimination. Protective finishes range from polyurethane for durability to natural oils for easy maintenance, each requiring specific application techniques.
Seasonal maintenance includes annual inspections, appropriate cleaning methods, and refinishing schedules. Outdoor pieces typically require refinishing every 2-3 years while indoor items last 5-10 years with proper care.
Conclusion
Strategic planning, quality materials, and professional techniques transform pallet projects from simple crafts into valuable furniture and garden features. Start with comprehensive pallet selection and safety assessment, then progress through proper preparation, assembly, and finishing methods.
Budget appropriately for different project levels, invest in quality tools and safety equipment, and focus on proper techniques that ensure durability and professional appearance. Document projects, develop skills progressively, and maintain finished pieces to maximize longevity and enjoyment.
These approaches support sustainable material reuse while creating functional, beautiful items that provide lasting value and satisfaction.
FAQ
Where can I find free or low-cost pallet wood in the United States?
Check local hardware stores, grocery chains, nurseries, and warehouses for surplus wood. Search Craigslist, Facebook Marketplace, and Nextdoor for people giving away pallets after deliveries. Ask at restaurants and home centers; many discard pallets weekly. Always inspect boards before taking them home.
How do I tell if a pallet is heat-treated or chemically treated?
Look for the stamp on the pallet block. “HT” means heat-treated and is safe for indoor furniture and garden planters. Avoid pallets marked “MB” (methyl bromide) or with unclear markings. When in doubt, skip it or use it for non-food, outdoor builds like fences or compost bins.
What tools and materials do I need to prep wood for indoor use?
Basic tools: pry bar, hammer, circular saw, orbital sander, drill, and screws. Materials: wood filler, sandpaper (80–220 grit), a food-safe wood sealant or varnish for kitchen pieces, and exterior-grade sealant for outdoor furniture like benches or planters. Wear gloves and safety glasses.
How should I sand, seal, and splinter-proof wood for a coffee table or headboard?
Start with coarse grit to remove rough spots, then progress to finer grits for a smooth finish. Fill gaps with wood filler, sand again, and wipe clean. Apply two coats of a durable sealant—polyurethane for indoor tables and a UV-resistant sealer for outdoor items. Buff lightly between coats for a smooth result.
Can I use reclaimed boards to build a bed frame or headboard safely?
Yes, after careful inspection. Remove nails and staples, check for rot or pests, and sand thoroughly. Use heat-treated boards when possible. For bedroom pieces, finish with a low-VOC sealant and attach sturdy hardware to meet weight and safety needs.
What’s a quick idea for a living room statement without heavy tools?
Make a simple coffee table by stacking and securing two or three reclaimed boards as a tabletop, adding hairpin or metal legs. Sand and seal the surface for spill resistance. This creates an industrial-style accent in a few hours with basic tools like a drill and sander.
How can I build compact storage for small spaces like balconies or entryways?
Design a slim bench with built-in drawer storage or a wall-mounted shelf with cubbies. Use narrow boards and vertical layouts to save floor space. Add caster wheels for easy mobility and coat hooks or a small shoe rack underneath for multi-use functionality.
What are best practices for creating a vertical herb garden or trellis fence?
Use rot-resistant, heat-treated boards and line planter boxes with landscape fabric. Add drainage holes and a shallow trough for herbs. For trellises, reinforce posts and attach slats to allow climbing plants to weave in. Label herbs with chalkboard tags for easy care.
Are reclaimed boards suitable for kitchen items like spice racks or serving trays?
Yes, if you use heat-treated wood and seal the surface with a food-safe finish for serving trays. For wall-mounted spice racks or pantry organizers, use corrosion-resistant screws and anchors. Keep trays well-sealed to resist stains and moisture.
How do I convert offcuts into useful items like boxes, bins, or a laptop stand?
Cut slats to size and glue or screw them into small boxes or bins. For a laptop stand, create a simple angled shelf with ventilation slots. Sand and seal all pieces for durability. Offcuts make sturdy step stools, waste-paper containers, and pet beds when reinforced properly.
Can I build outdoor seating like swing beds or benches without advanced carpentry skills?
Yes. Use reinforced supports, quality hardware, and weather-resistant finishes. A basic swing bed requires strong hanging points, galvanized chains or straps, and cross-bracing. Corner benches around firepits can be made with simple box frames and hidden storage.
What safety steps should I follow when working with reclaimed wood?
Wear gloves, eye protection, and a dust mask. Remove all nails and staples carefully to avoid injury. Work in a well-ventilated area when sanding and finishing. Check for chemical stamps and avoid using suspect wood for food-contact items or indoor furniture.
How much should I budget for different types of pallet projects?
Simple weekend projects like serving trays and small planters cost $20-$75 including materials and basic finishes. Intermediate furniture pieces range $75-$250 for materials, hardware, and protective finishes. Advanced builds like bed frames and kitchen islands cost $200-$500+ including quality hardware, professional-grade finishes, and specialized components.
What tools are essential vs. nice-to-have for pallet projects?
Essential tools include pry bars ($15-$40), hammers, drill sets ($50-$150), and orbital sanders ($80-$200). Nice-to-have upgrades include circular saws ($100-$300), reciprocating saws, and pneumatic nailers ($150-$400) that speed work for frequent builders. Always invest in quality safety equipment first.
How do I ensure my pallet furniture is structurally sound and safe?
Use appropriate fasteners rated for expected loads, reinforce stress points with brackets or additional support, and test stability before regular use. For seating, plan for 300+ pounds capacity. For shelving, calculate dead loads plus expected contents. When in doubt, over-engineer rather than risk failure.
What’s the best way to finish pallet wood for different environments?
Indoor projects use low-VOC polyurethane or natural oil finishes with proper surface preparation. Outdoor projects require UV-resistant stains and sealers reapplied every 2-3 years. Kitchen items need food-safe finishes that resist moisture and heat. Always sand progressively (80-120-180 grit) for smooth results.
How do I maintain outdoor wood items like planter boxes and privacy screens?
Clean surfaces annually, sand any rough spots, and apply a fresh coat of exterior-grade sealer or stain. Elevate planters slightly to improve drainage and prevent rot. Replace damaged slats promptly to keep structures safe and attractive.
What’s a simple decor idea using reclaimed boards for walls or art?
Create a feature wall with staggered horizontal slats for a reclaimed look, or stencil on slats for textured signs and frames. Photo transfer techniques and seasonal cutouts—like pumpkins or flag motifs—make striking wall art for living rooms and entryways.
How can I ensure my builds meet durability needs for garages and tool benches?
Use thicker boards for work surfaces, reinforce joints with brackets and glue, and attach a solid back panel for stability. Mount pegboards or panel organization systems for tools, and treat surfaces with an oil-based finish to resist wear and stains.