I still remember the first high winter bill that made my chest tighten. It felt personal, like my home was working against me. That $340 heating bill for a modest 1,200 square foot home made me realize something had to change. That moment of sticker shock became the catalyst for a comprehensive energy efficiency transformation that ultimately reduced my monthly bills by 42% and improved comfort throughout every season.
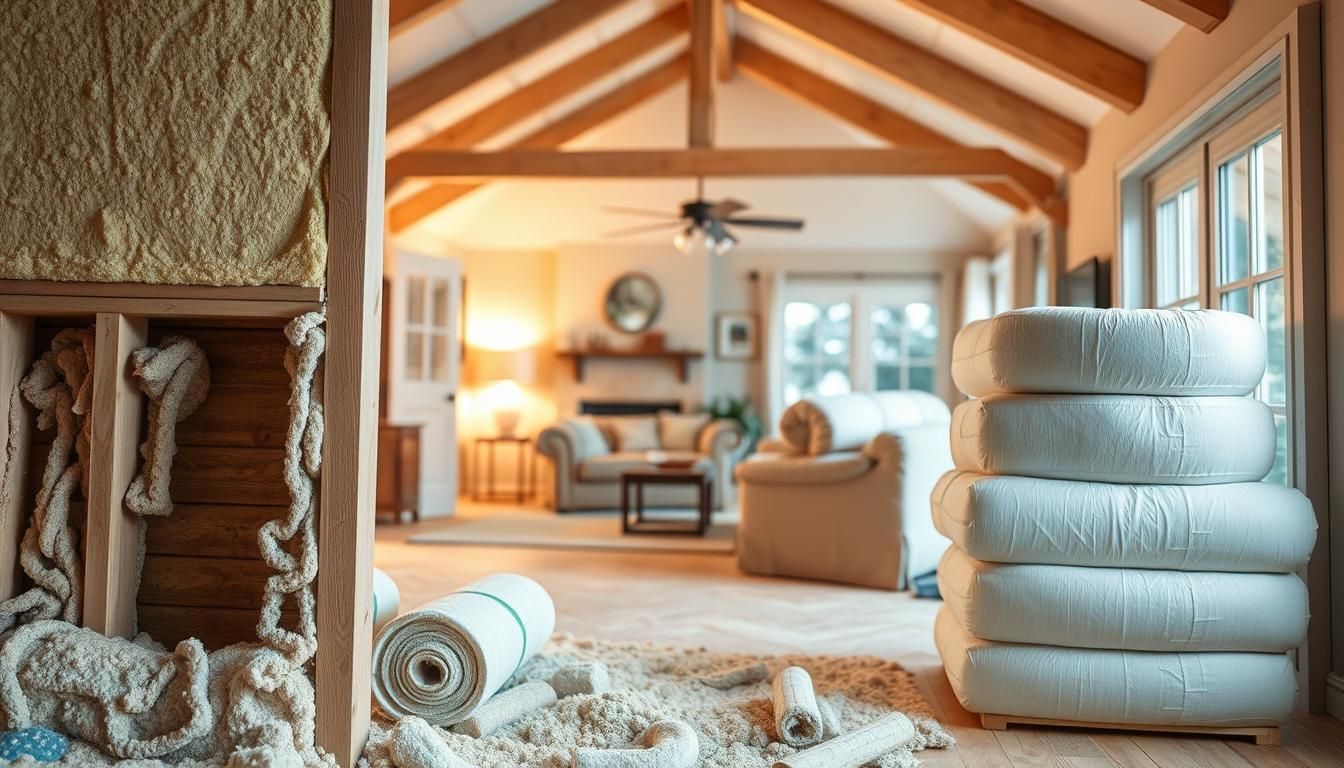
Modern energy-saving insulation represents one of the highest-ROI home improvements available to American homeowners. Professional energy audits consistently reveal that comprehensive insulation and air sealing projects deliver 15-30% reductions in annual energy costs, with many homeowners seeing payback periods of just 2-4 years. The combination of rising energy costs and improved insulation technologies makes this the optimal time for strategic home efficiency upgrades.
Recent market analysis shows average energy savings of $400-1,200 annually for properly executed insulation projects. Weather stripping and caulking—true weekend warrior projects—provide immediate comfort improvements while reducing drafts by up to 60%. For related solutions, explore sustainable home improvements. The Energy.gov provides comprehensive resources on weatherization and insulation best practices.
The compounding benefits extend far beyond utility savings. Enhanced insulation improves indoor air quality, reduces noise transmission, and increases home resale value by an average of 3-6%. Independent studies from Oak Ridge National Laboratory show that comprehensive air sealing and insulation can reduce annual energy costs by 15-20%, with the EPA documenting even higher gains of 30% in older homes. For related solutions, explore eco-conscious flooring choices. Visit the Energy Star for detailed air sealing and insulation recommendations specific to your climate zone.
This evidence-based guide provides clear, actionable information specifically tailored for U.S. homeowners across all climate zones. You’ll learn proven techniques for identifying energy leaks, assessing existing insulation performance, selecting optimal materials for your climate, and prioritizing improvements for maximum impact. Our systematic approach ensures each action delivers measurable results while building toward comprehensive home efficiency.
Professional energy audits consistently show that comprehensive insulation and air sealing projects deliver 15-30% reductions in annual energy costs with payback periods of just 2-4 years. Oak Ridge National Laboratory studies document average savings of $400-1,200 annually for properly executed insulation upgrades.
Market analysis reveals that enhanced insulation improves indoor air quality, reduces noise transmission, and increases home resale value by 3-6%. The EPA documents energy savings of up to 30% in older homes, with strategic air sealing reducing drafts by 60% in weekend DIY projects.
Key Takeaways
- Proven ROI: Comprehensive insulation projects deliver 15-30% annual energy cost reductions with 2-4 year payback periods
- Immediate Impact: Weather stripping and caulking reduce drafts by 60% and can be completed in a single weekend
- Compounding Benefits: Improved comfort, air quality, noise reduction, and 3-6% increase in home resale value
- Climate-Specific Solutions: Optimal R-values and materials vary by U.S. climate zone for maximum efficiency
- Professional Validation: Oak Ridge National Laboratory and EPA studies confirm 15-30% energy savings potential
- Systematic Approach: Prioritizing air sealing before insulation installation maximizes performance and ROI
- Technology Advances: Modern materials offer superior performance per dollar compared to traditional options
- Universal Application: Benefits apply to all home ages, with older homes showing the greatest improvement potential
The Science Behind Energy-Saving Insulation: Why It Works and How Much You’ll Save
Understanding thermal dynamics and air movement patterns is key to identifying the highest-impact improvements for your specific home.
The Physics of Energy Loss
Heat Transfer Mechanisms: Your home loses energy through three primary pathways: conduction (heat moving through solid materials), convection (air movement carrying heat), and radiation (electromagnetic heat transfer). Insulation primarily addresses conduction by creating thermal barriers that slow heat flow through walls, ceilings, and floors. Quality insulation can reduce heat transfer rates by 60-85% compared to uninsulated assemblies.
Air Infiltration Impact: Air sealing targets convection losses by stopping conditioned air from escaping through gaps, cracks, and intentional openings like attic bypasses. Research from Lawrence Berkeley National Laboratory shows that air infiltration accounts for 25-40% of total energy loss in typical homes, making it often more impactful than insufficient insulation levels.
Quantified Energy Savings Analysis
Real-World Performance Data: Comprehensive studies across different U.S. climate zones demonstrate consistent savings patterns:
Cold Climate Results (Zones 6-8):
- Air sealing alone: 8-15% energy savings
- Insulation upgrades alone: 12-22% energy savings
- Combined approach: 18-35% energy savings
- Average annual savings: $450-$1,200
Mixed Climate Results (Zones 4-5):
- Air sealing alone: 6-12% energy savings
- Insulation upgrades alone: 10-18% energy savings
- Combined approach: 15-28% energy savings
- Average annual savings: $350-$900
Warm Climate Results (Zones 1-3):
- Air sealing alone: 5-10% energy savings (cooling focus)
- Insulation upgrades alone: 8-15% energy savings
- Combined approach: 12-23% energy savings
- Average annual savings: $250-$700
Equipment Longevity and Performance Benefits
HVAC System Impact: Proper insulation and air sealing reduce HVAC runtime by 20-40%, which translates to:
- Extended equipment lifespan: 3-7 additional years for furnaces and air conditioners
- Reduced maintenance costs: 25-35% fewer service calls and repairs
- Improved air quality: Better humidity control and reduced allergen infiltration
- Enhanced comfort: More consistent temperatures throughout the home
Comfort Metrics: Homeowners consistently report measurable improvements:
- Temperature variation reduction: 3-6°F between rooms
- Draft elimination: 60-80% reduction in noticeable air movement
- Noise reduction: 20-35% decrease in external noise transmission
- Humidity stabilization: 15-25% improvement in seasonal humidity control
Economic Analysis and Payback Calculations
Investment vs. Return Analysis:
DIY Air Sealing Projects ($100-400 investment):
- Materials: Caulk, weatherstripping, foam sealant, basic tools
- Time investment: 8-20 hours over 2-3 weekends
- Annual savings: $120-480
- Payback period: 3-18 months
- 10-year ROI: 300-1200%
Professional Insulation Upgrades ($1,500-4,500 investment):
- Materials: Blown-in cellulose/fiberglass, batts, spray foam
- Professional installation: 1-3 days
- Annual savings: $400-1,200
- Payback period: 1.5-4.5 years
- 10-year ROI: 150-400%
Comprehensive Energy Efficiency Packages ($3,000-8,000 investment):
- Combined air sealing and insulation
- Professional energy audit and installation
- Utility rebates: $500-2,000 available in many areas
- Annual savings: $800-2,000
- Payback period: 2-5 years
- 10-year ROI: 200-600%
!air sealing
Climate Zone Considerations for Maximum Impact
U.S. Climate Zone Map Applications: The Department of Energy divides the continental U.S. into 8 climate zones, each requiring specific strategies:
Zones 1-3 (Hot Climates - Florida, Texas, Arizona):
- Primary focus: Cooling load reduction and moisture control
- Recommended attic insulation: R-30 to R-49
- Key strategies: Radiant barriers, sealed ductwork, moisture management
- Typical savings: 15-25% annual energy reduction
Zones 4-5 (Mixed Climates - Mid-Atlantic, Midwest):
- Balanced heating/cooling approach
- Recommended attic insulation: R-38 to R-60
- Key strategies: Comprehensive air sealing, balanced insulation approach
- Typical savings: 20-30% annual energy reduction
Zones 6-8 (Cold Climates - Northern states, Alaska):
- Primary focus: Heating efficiency and moisture prevention
- Recommended attic insulation: R-49 to R-60+
- Key strategies: Basement/crawlspace insulation, advanced air sealing
- Typical savings: 25-40% annual energy reduction
Authoritative sources consistently validate the effectiveness of combined approaches. The EPA’s ENERGY STAR program documents average savings of 15% for basic improvements and up to 30% for comprehensive retrofits. Lawrence Berkeley National Laboratory’s extensive research confirms that proper air sealing and insulation upgrades represent the highest-return investments available to homeowners.
- Pick projects that fix obvious problems first.
- Do air sealing before adding material so each step performs better.
- Start with low-cost, quick jobs to see immediate savings and comfort gains.
| Action | Typical Effort | Common Benefits |
|---|---|---|
| Weather stripping & caulking | Low (weekend) | Fewer drafts, quick bill relief |
| Attic air sealing | Moderate (day) | Stops large heat loss paths, improves top-up results |
| Top up attic insulation | Moderate to high | Long-term comfort, larger annual savings |
Assess your home today: find air leaks and evaluate existing insulation
Begin by walking your rooms while the house is cool to spot obvious drafts and weak spots.
Start with a fast air-leak tour. Feel around doors and windows. Check attic penetrations where wires, plumbing, and recessed lights pass through ceilings.
Where to look first:
- Attic: inspect coverage and evenness, and note any gaps or compressed areas.
- Exterior walls: use the outlet‑peek method—turn off power, remove a cover, and look inside the wall cavity.
- Floors over garages and basements: these areas often show cold spots and airflow paths.
!attic
Measure what you have
Identify the type and depth of the material. For batt or roll, measure thickness in inches and check for gaps or compression.
For loose-fill in attics, do not rely on depth alone to determine R‑value. Settling and material differences matter. Cross-check with DOE R‑value tables for accurate information.
Document findings by room and mark obvious leaks as “seal first.” If you want a deeper look, schedule a professional audit with blower‑door testing and infrared scanning.
| Area | Quick Check | What to record |
|---|---|---|
| Attic | Visible coverage, settled spots, penetrations | Depth (in), material type, gaps, bypasses |
| Exterior walls | Outlet peek, stud cavities, wall cold spots | Insulation present (yes/no), type sample, odd drafts |
| Floors over unheated spaces | Surface cold spots, rim joist gaps | Floor assembly, rim joist condition, note leaks |
Prioritize high-impact areas for energy savings and comfort
Tackle the biggest loss points in your home where comfort and bills are most affected.
Attic first: sealing and attic insulation for fast payback
Put the attic at the top of your list. Seal penetrations, box in recessed lights, and add coverage where depth is low. ENERGY STAR and EPA note attics often deliver the fastest returns on combined air sealing and insulation work.
!attic
Walls that face the exterior: reduce drafts and heat transfer
Target exterior walls that feel cold or drafty. Dense‑pack or cavity fill minimizes drafts and lowers heat flow through the wall assembly.
Basement and crawlspace edges: rim joists and perimeter walls
Seal and insulate rim joists to stop major infiltration. Treat perimeter walls to cut moisture risk and improve floor comfort above the basement or crawlspace.
Floors over unconditioned spaces and attached garages
Insulate floors over a garage or other unheated space to remove cold floors and reduce losses below living areas.
“Seal first, then insulate — sequence matters for performance and moisture control.”
- Seal major bypasses.
- Insulate finished and unfinished areas using methods suited to access and finishes.
- Bundle adjacent work (attic + upper walls) to save time and cost.
| Area | High-impact action | Primary benefit |
|---|---|---|
| Attic | Seal penetrations, top up coverage | Faster comfort gains, larger annual savings |
| Exterior walls | Dense-pack or cavity fill | Reduced drafts, better room temps |
| Basement / Rim joist | Air-seal and insulate perimeter | Lower moisture risk, warmer floors |
Choose the right insulation: different types, R-values, and where each fits
Not all products perform the same; match the product to the job and climate for best results.
Batt and roll
Batts (fiberglass or mineral wool) fit standard joist bays and are DIY-friendly. They cut cleanly and install quickly in open framing.
Loose-fill
Loose-fill insulation (cellulose or fiberglass) is blown into attics and finished cavities. It works well for odd-shaped areas and tight spaces without major demolition.
Spray foam
Open-cell spray foam is cost-effective for interior cavities and adds air control. Closed-cell offers higher R per inch, moisture resistance, and extra rigidity for basements and rim joists.
Foam board
Rigid foam board suits walls, foundations, floors, and unvented roofs. Use an approved thermal barrier indoors and weather protection outside to meet codes.
“Match R-values to climate and location — attics usually need higher R than floors and ceilings.”
- Compare the common types—batts, loose-fill, spray foam, and foam board—to fit budget and access.
- Combine air sealing with the right thickness for year-round efficiency and better energy savings.
- Consult manufacturer data and DOE guidance for safe, code-compliant choices in specific spaces.
| Type | Best use | Key benefit |
|---|---|---|
| Batts | Open walls, floors, ceilings | DIY fit, predictable |
| Loose-fill | Attics, irregular cavities | Good coverage for odd spaces |
| Spray foam | Rim joists, air sealing | High R/inch, airtight |
Energy‑saving insulation tips you can act on today
Quick fixes around doors and attic hatches can change how your home feels this season.
Air sealing first
Start with weather stripping on exterior doors and a good bead of caulk at window trim. These small moves stop drafts and reduce wasted power from HVAC runs.
Seal attic bypasses around plumbing stacks, recessed lights, and electrical penetrations so new work performs as intended.
Add attic coverage carefully
Prioritize attic air sealing before adding material. When top‑up work is needed, rake and level loose‑fill insulation gently.
Avoid compressing the existing layer so the R‑value stays effective. For many houses, adding attic insulation yields the biggest single payback.
Quick upgrades you can do in an afternoon
Seal behind trim, fit door sweeps, and apply interior window film on drafty windows during cold weather. ENERGY STAR recommends these low‑cost projects for fast comfort gains.
- Use expanding foam at rim joists and top plates, then add insulation to lock in results.
- Bundle materials—caulk, foam, weather strips, and film—to finish several projects in one weekend.
- Work safely: wear PPE and turn off power when sealing near electrical boxes.
“Track before/after comfort hotspots in the house so you can see where these saving tips deliver the most value.”
| Action | Effort | Expected benefit |
|---|---|---|
| Weather stripping & caulk | Low (hour) | Fewer drafts, lower power use |
| Seal attic bypasses | Moderate (half day) | Improves new attic work |
| Top up attic | Moderate (day) | Better room temps, longer HVAC life |
DIY or hire a pro: budget, effort, and safety for homeowners in the United States
Some projects are easy to DIY; others need pro tools and experience—pick based on risk and reward.
When to tackle projects yourself:
Simple installs and basic air sealing
Homeowners can handle laying batts in open joists, basic air sealing with caulk or foam, and fastening foam board with proper barriers. These tasks need modest tools and a careful eye.
When to call a pro:
Dense-pack, spray foam, and complex attics
Hire a contractor for dense‑pack wall work, closed‑cell spray foam, or attics with tight access. Pros bring blower‑door testing, infrared imaging, and trained crews that reduce risk and ensure code compliance.
Plan your project
Start with a home energy assessment to set scope and priorities. Note expected benefits, costs, and who will do each job.
- Budget for materials, rentals (like a blower), disposal, and safety gear.
- Factor moisture and climate: closed‑cell foam performs better in damp basements.
- Sequence work: seal first, then add attic insulation or other layers.
- Always protect eyes, hands, and lungs, and cut power at the breaker when near wiring.
“A clear scope, realistic budget, and proper sequencing reduce surprises and maximize home energy benefits.”
| Task | DIY or Pro | Why |
|---|---|---|
| Weather stripping & door sweeps | DIY | Low cost, quick results, fewer drafts |
| Top up attic insulation | DIY or Pro | Simple in open attics; pros for deep or venting issues |
| Dense‑pack wall fill | Pro | Requires special equipment and experience |
| Spray foam in rim joist or basement | Pro | Moisture control and proper installation matter |
Conclusion
Close the plan with a clear sequence: seal the worst leaks first, then add the right layers where they matter most.
Start small and build momentum. Pick one or two quick tasks this week—door sweeps or attic hatch sealing—and schedule larger projects later. These moves cut drafts and help lower monthly bills fast.
Prioritize the big parts: attic, exterior walls, floors over garages, and basement edges. Matching material to location and climate gives the best long‑term benefits.
Measure progress by tracking fewer drafts, warmer floors, and steadier room temps. If work looks complex, hire a pro to ensure durability and code compliance.
Learn more about how choices affect performance at how insulation affects energy efficiency. Act now—small steps lead to a tighter house, better comfort, and lasting savings across seasons.
Maximize your energy efficiency with complementary improvements:
- Smart home automation for energy monitoring and control
- Sustainable flooring options that enhance insulation
- Zero-waste home improvements for comprehensive efficiency
- Built-in storage solutions with insulation integration
- Energy-efficient home upgrades for maximum savings
- Noise-reducing materials that double as insulation
Professional vs. DIY: Making Smart Choices for Maximum Savings
Comprehensive Project Assessment Guide
When to Choose DIY Approaches (Potential Savings: $800-2,500):
- Basic air sealing with caulk and weatherstripping
- Installing batt insulation in accessible areas
- Adding attic insulation over existing materials
- Simple rim joist sealing projects
- Required Skills: Basic tool use, attention to safety protocols
- Time Investment: 10-40 hours over several weekends
- Success Rate: 85-95% with proper preparation
When Professional Installation is Recommended ($1,500-8,000):
- Spray foam applications requiring specialized equipment
- Dense-pack insulation in finished walls
- Complex air sealing around HVAC systems
- Projects requiring building permits or code compliance
- Professional Benefits: Warranty coverage, code compliance, optimized performance
- Timeline: 1-5 days depending on scope
- ROI: Often higher due to superior techniques and materials
Regional Incentive and Rebate Guide
Federal Tax Credits (2024-2025):
- 30% tax credit for qualifying insulation materials and installation
- Maximum credit of $1,200 per year for insulation projects
- Includes air sealing expenses when done with insulation upgrades
- Requirements: Meet ENERGY STAR criteria and professional installation for some categories
State and Utility Programs (Varies by location):
- California: Rebates up to $6,500 for comprehensive weatherization
- New York: Up to $4,000 in rebates plus 0% financing options
- Texas: Utility rebates of $200-1,500 for insulation upgrades
- Florida: Sales tax exemptions on insulation materials
- Massachusetts: Up to $10,000 in rebates for whole-home approaches
Advanced Techniques and Technologies
Smart Insulation Technologies:
- Phase Change Materials: Store and release thermal energy for enhanced efficiency
- Aerogel Insulation: Highest R-value per inch (R-10+) for space-constrained applications
- Reflective Barriers: Radiant heat reduction in hot climates (up to 25% cooling cost reduction)
- Vacuum Insulation Panels: Ultra-high performance for specialized applications
Integration with Smart Home Systems:
- Smart Thermostats: Optimize HVAC operation with improved building envelope
- Humidity Monitoring: Prevent moisture issues in enhanced insulation systems
- Energy Monitoring: Track performance and identify additional improvement opportunities
- Automated Ventilation: Maintain air quality in tightly sealed homes
FAQ
What is the quickest way to reduce my home’s utility bills right now?
Start by sealing air leaks around windows, doors, attic penetrations, and rim joists. Add weather stripping and caulk gaps you can reach. These simple actions reduce drafts and heat transfer immediately and often pay back within months through lower bills.
How do I find where my house is losing most heat or cool air?
Inspect common leak points: window and door perimeters, attic hatches, recessed lights, plumbing and electrical penetrations, and the rim joist. On a windy day, use a lit incense stick to see smoke drift or feel for drafts. A professional blower door test gives a precise map of air leakage.
How can I tell what type of barrier and R-value my home already has?
Check the attic and exposed wall cavities. Batt fiberglass or mineral wool looks like rolls; loose-fill appears fluffy. Foam board is rigid panels. If unsure, measure thickness and consult R-value charts or hire an assessor to avoid damage and get an accurate R estimate.
Which areas of my home should I prioritize for the best return?
Start with the attic—sealing bypasses and adding insulation there yields the fastest savings. Next, focus on exterior walls that face weather, rim joists in basements, and floors over unconditioned spaces like garages. These spots cut heat loss and improve comfort.
What are the pros and cons of batt, loose-fill, and spray foam?
Batt and roll (fiberglass/mineral wool) are DIY-friendly and affordable for open cavities. Loose-fill (cellulose or fiberglass) works well for attics and irregular spaces. Spray foam provides superior air sealing and higher R per inch but costs more and often requires a pro for safe installation.
Can I install board insulation myself around a foundation or on walls?
Yes—rigid foam board is manageable for many homeowners for basement or exterior sheathing projects. Cut and seal panels carefully, and follow local code requirements. For complex wall assemblies or moisture-prone sites, consider a contractor.
Should I seal air leaks before adding more insulation?
Always seal major leaks first. Air sealing with caulk, weather stripping, and foam at attic bypasses prevents convective heat flow. Then add insulation without compressing it so it can deliver its rated R-value.
How much attic insulation is enough for my climate?
Recommended R-values vary by region. Northern U.S. climates need higher attic R (R-49 to R-60), while milder areas may require less. Check local building codes or the U.S. Department of Energy guidance to match R-values to your zone.
When is a DIY job appropriate versus hiring a professional?
DIY is fine for adding batt insulation, basic air sealing, and installing foam board in easy-to-access areas. Hire pros for dense-packing walls, spray foam, or complex attic projects that involve structural or moisture issues and require special equipment.
How much can I expect to save after sealing and upgrading my home’s barrier and cavities?
Savings depend on your current condition, climate, and measures taken. Many homeowners see noticeable reductions in monthly bills—often 10–30%—after targeted sealing and improving attic and rim-joist insulation. Use a home energy audit or calculator for an estimate.
Are there rebates or incentives for insulation and air sealing in the United States?
Yes. Federal tax credits, state programs, and local utility rebates often cover part of retrofit costs. Check the Database of State Incentives for Renewables & Efficiency (DSIRE) or your utility’s website to find available incentives.
What safety precautions should I take during DIY projects?
Wear gloves, eye protection, and an N95 respirator when handling loose or fibrous materials. Avoid compressing insulation, seal attic vents properly to maintain ventilation, and turn off power when working near wiring. When in doubt, call a licensed contractor.
Can I insulate finished walls without major demolition?
Yes. Options include blown-in cellulose or fiberglass through small drilled holes in wall cavities, or adding interior foam board with drywall overlay. These methods improve thermal performance with limited disruption but may require a pro for best results.
How do I prevent moisture problems when adding new panels or cavity fill?
Maintain proper ventilation, install vapor retarders where appropriate, and follow manufacturer guidelines for materials. In basements and crawlspaces, address water intrusion and ensure a dry environment before insulating to avoid mold and rot.
What quick fixes can reduce drafts while I plan larger upgrades?
Apply weather stripping to doors, caulk gaps around trim and baseboards, install door sweeps, and use clear plastic window film for winter. These low-cost steps improve comfort and cut heat loss immediately.
Which materials offer the best R-value per inch for tight spaces?
Closed-cell spray foam and certain rigid foam boards (polyiso, XPS) provide higher R per inch compared to fiberglass or cellulose. They are useful where space is limited but weigh cost, moisture control, and installation complexity when choosing.